Workspaces
Workspaces provide a convenient VSCode development environment for iterating on your Union.ai tasks, workflows, and apps.
With workspaces, you can:
- Develop and debug your tasks, workflows, or code in general
- Run your tasks and workflows in a way that matches your production environment
- Deploy your workflows and apps to development, staging, or production environments
- Persist files across workspace restarts to save your work
- Specify secrets and resources for your workspace
- Specify custom container images
- Specify custom
on_startupcommands - Adjust the idle time-to-live (TTL) for your workspace to avoid unneeded expenses
- Authenticate with GitHub to clone private repositories
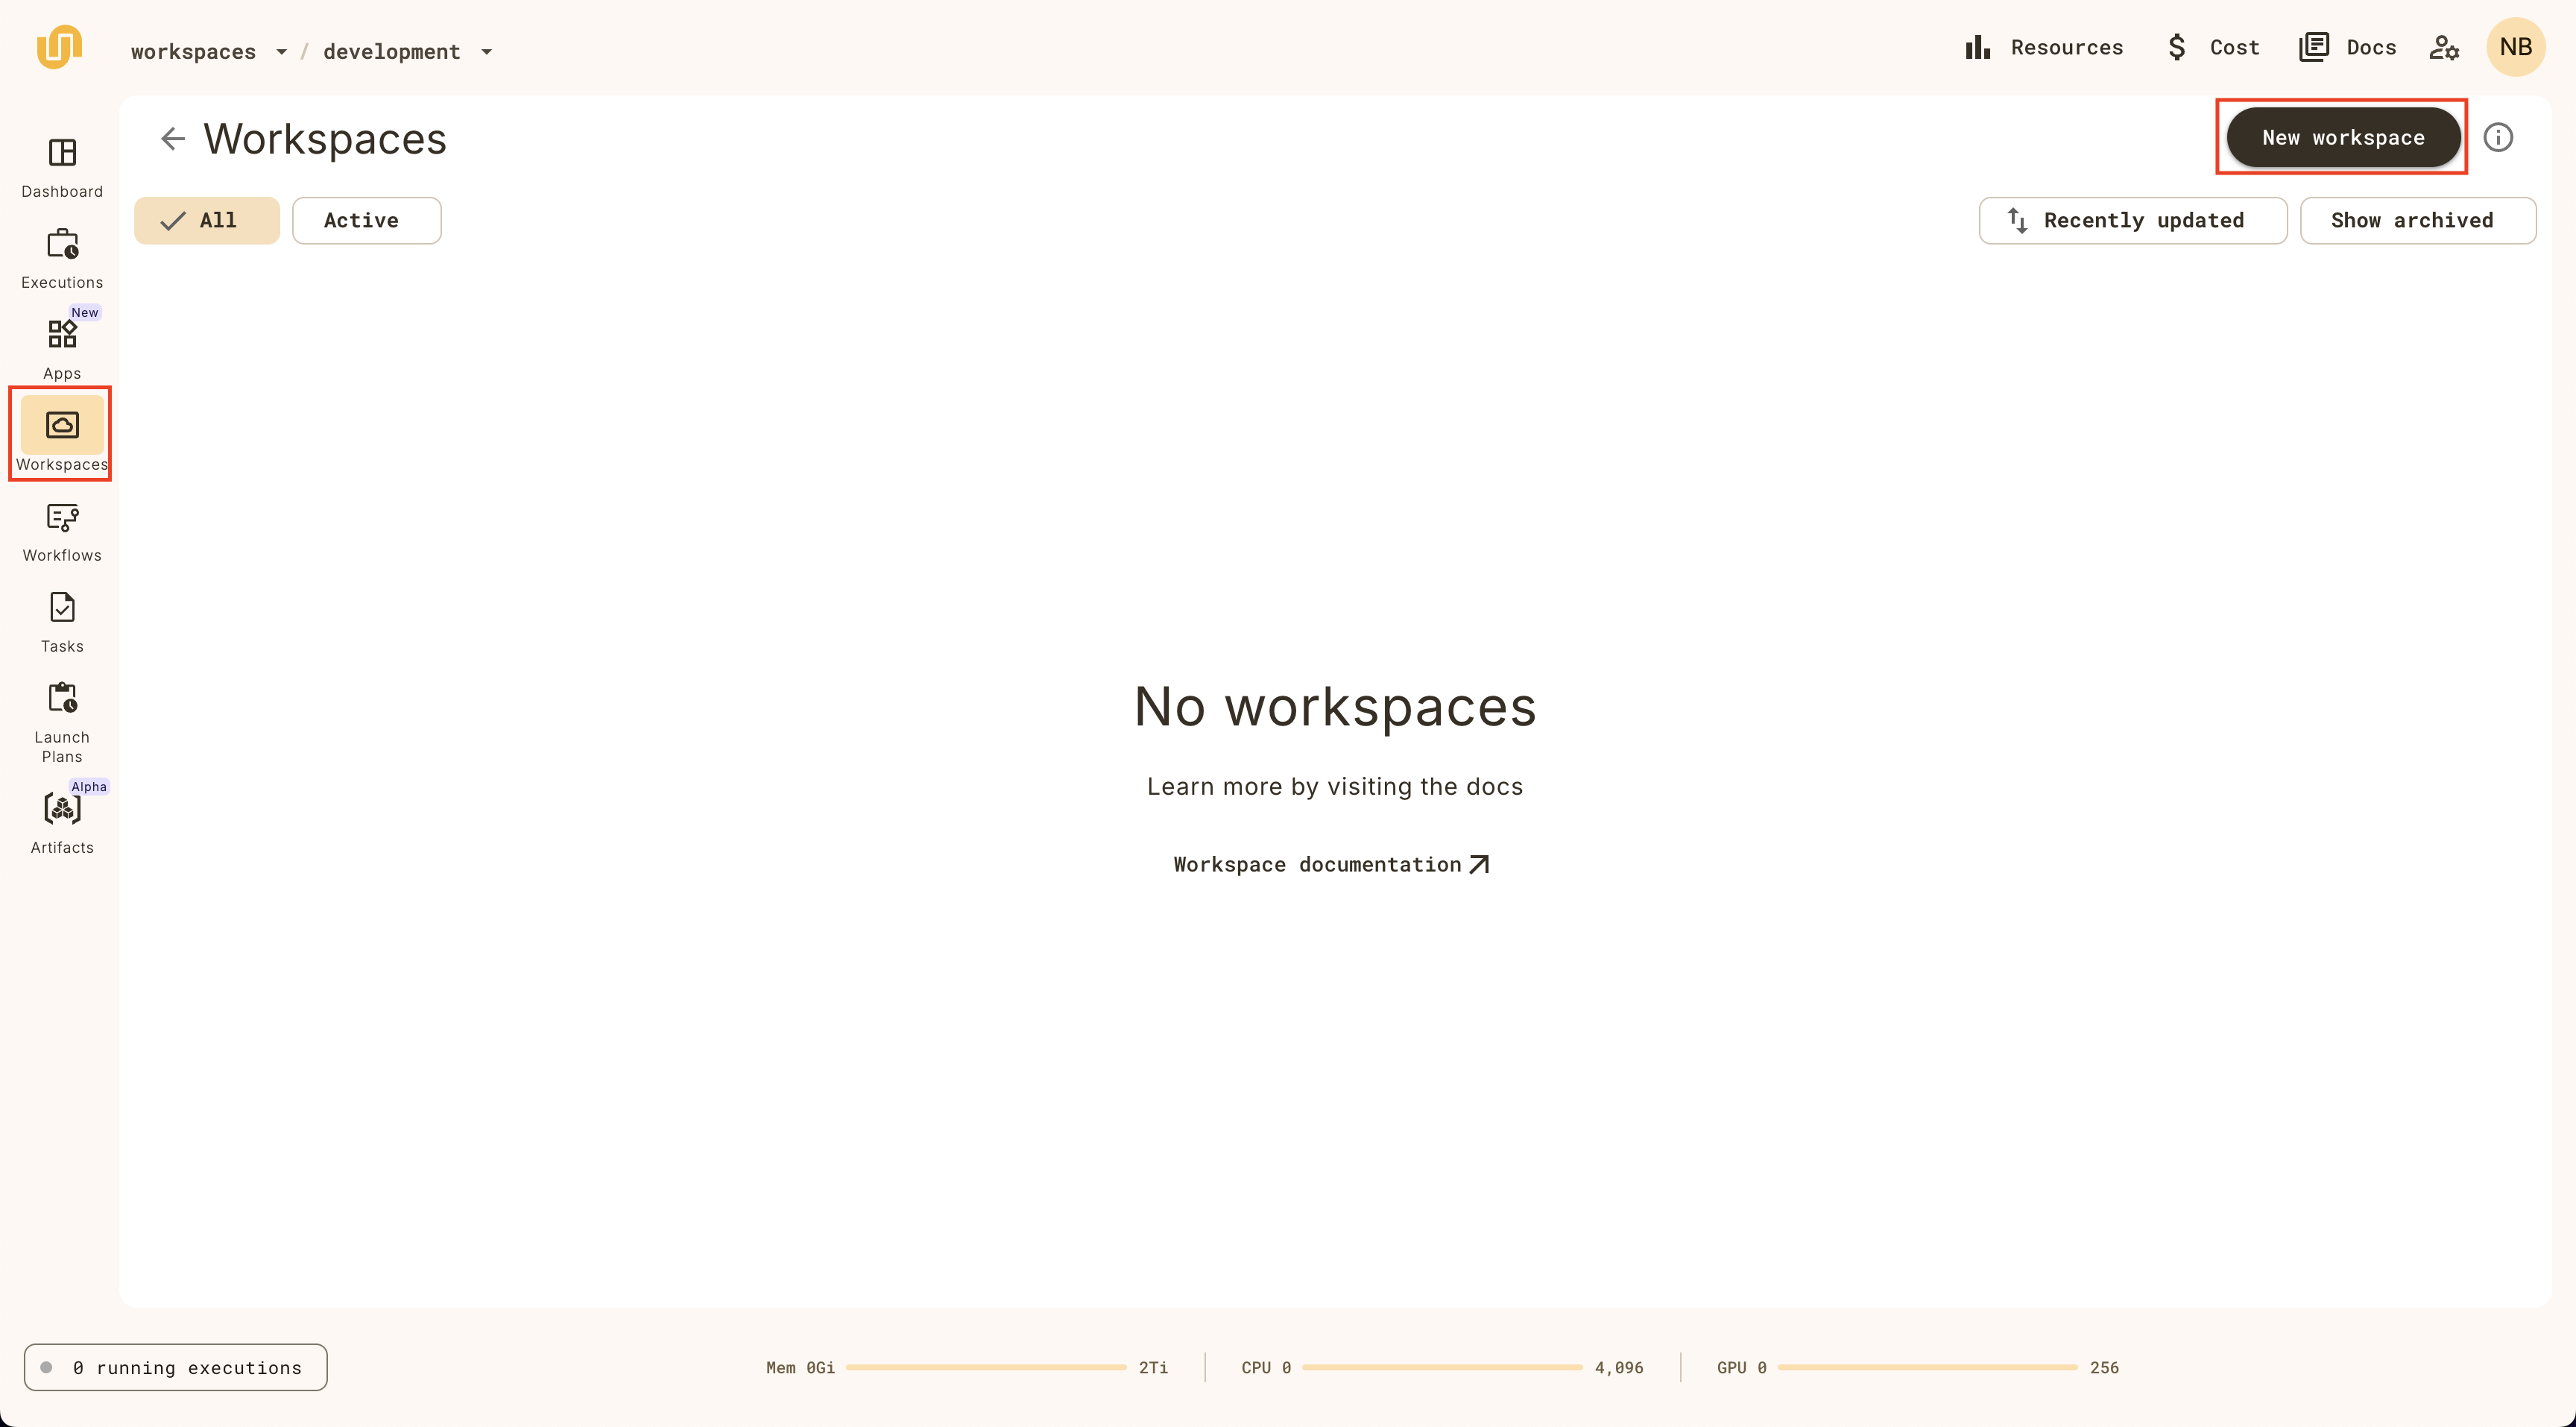
Creating a workspace
To create a workspace, click on the Workspace tab on left navbar and click on the New Workspace button on the top right.
Provide a name for your workspace, set an Idle TTL (time to live), and click Create.
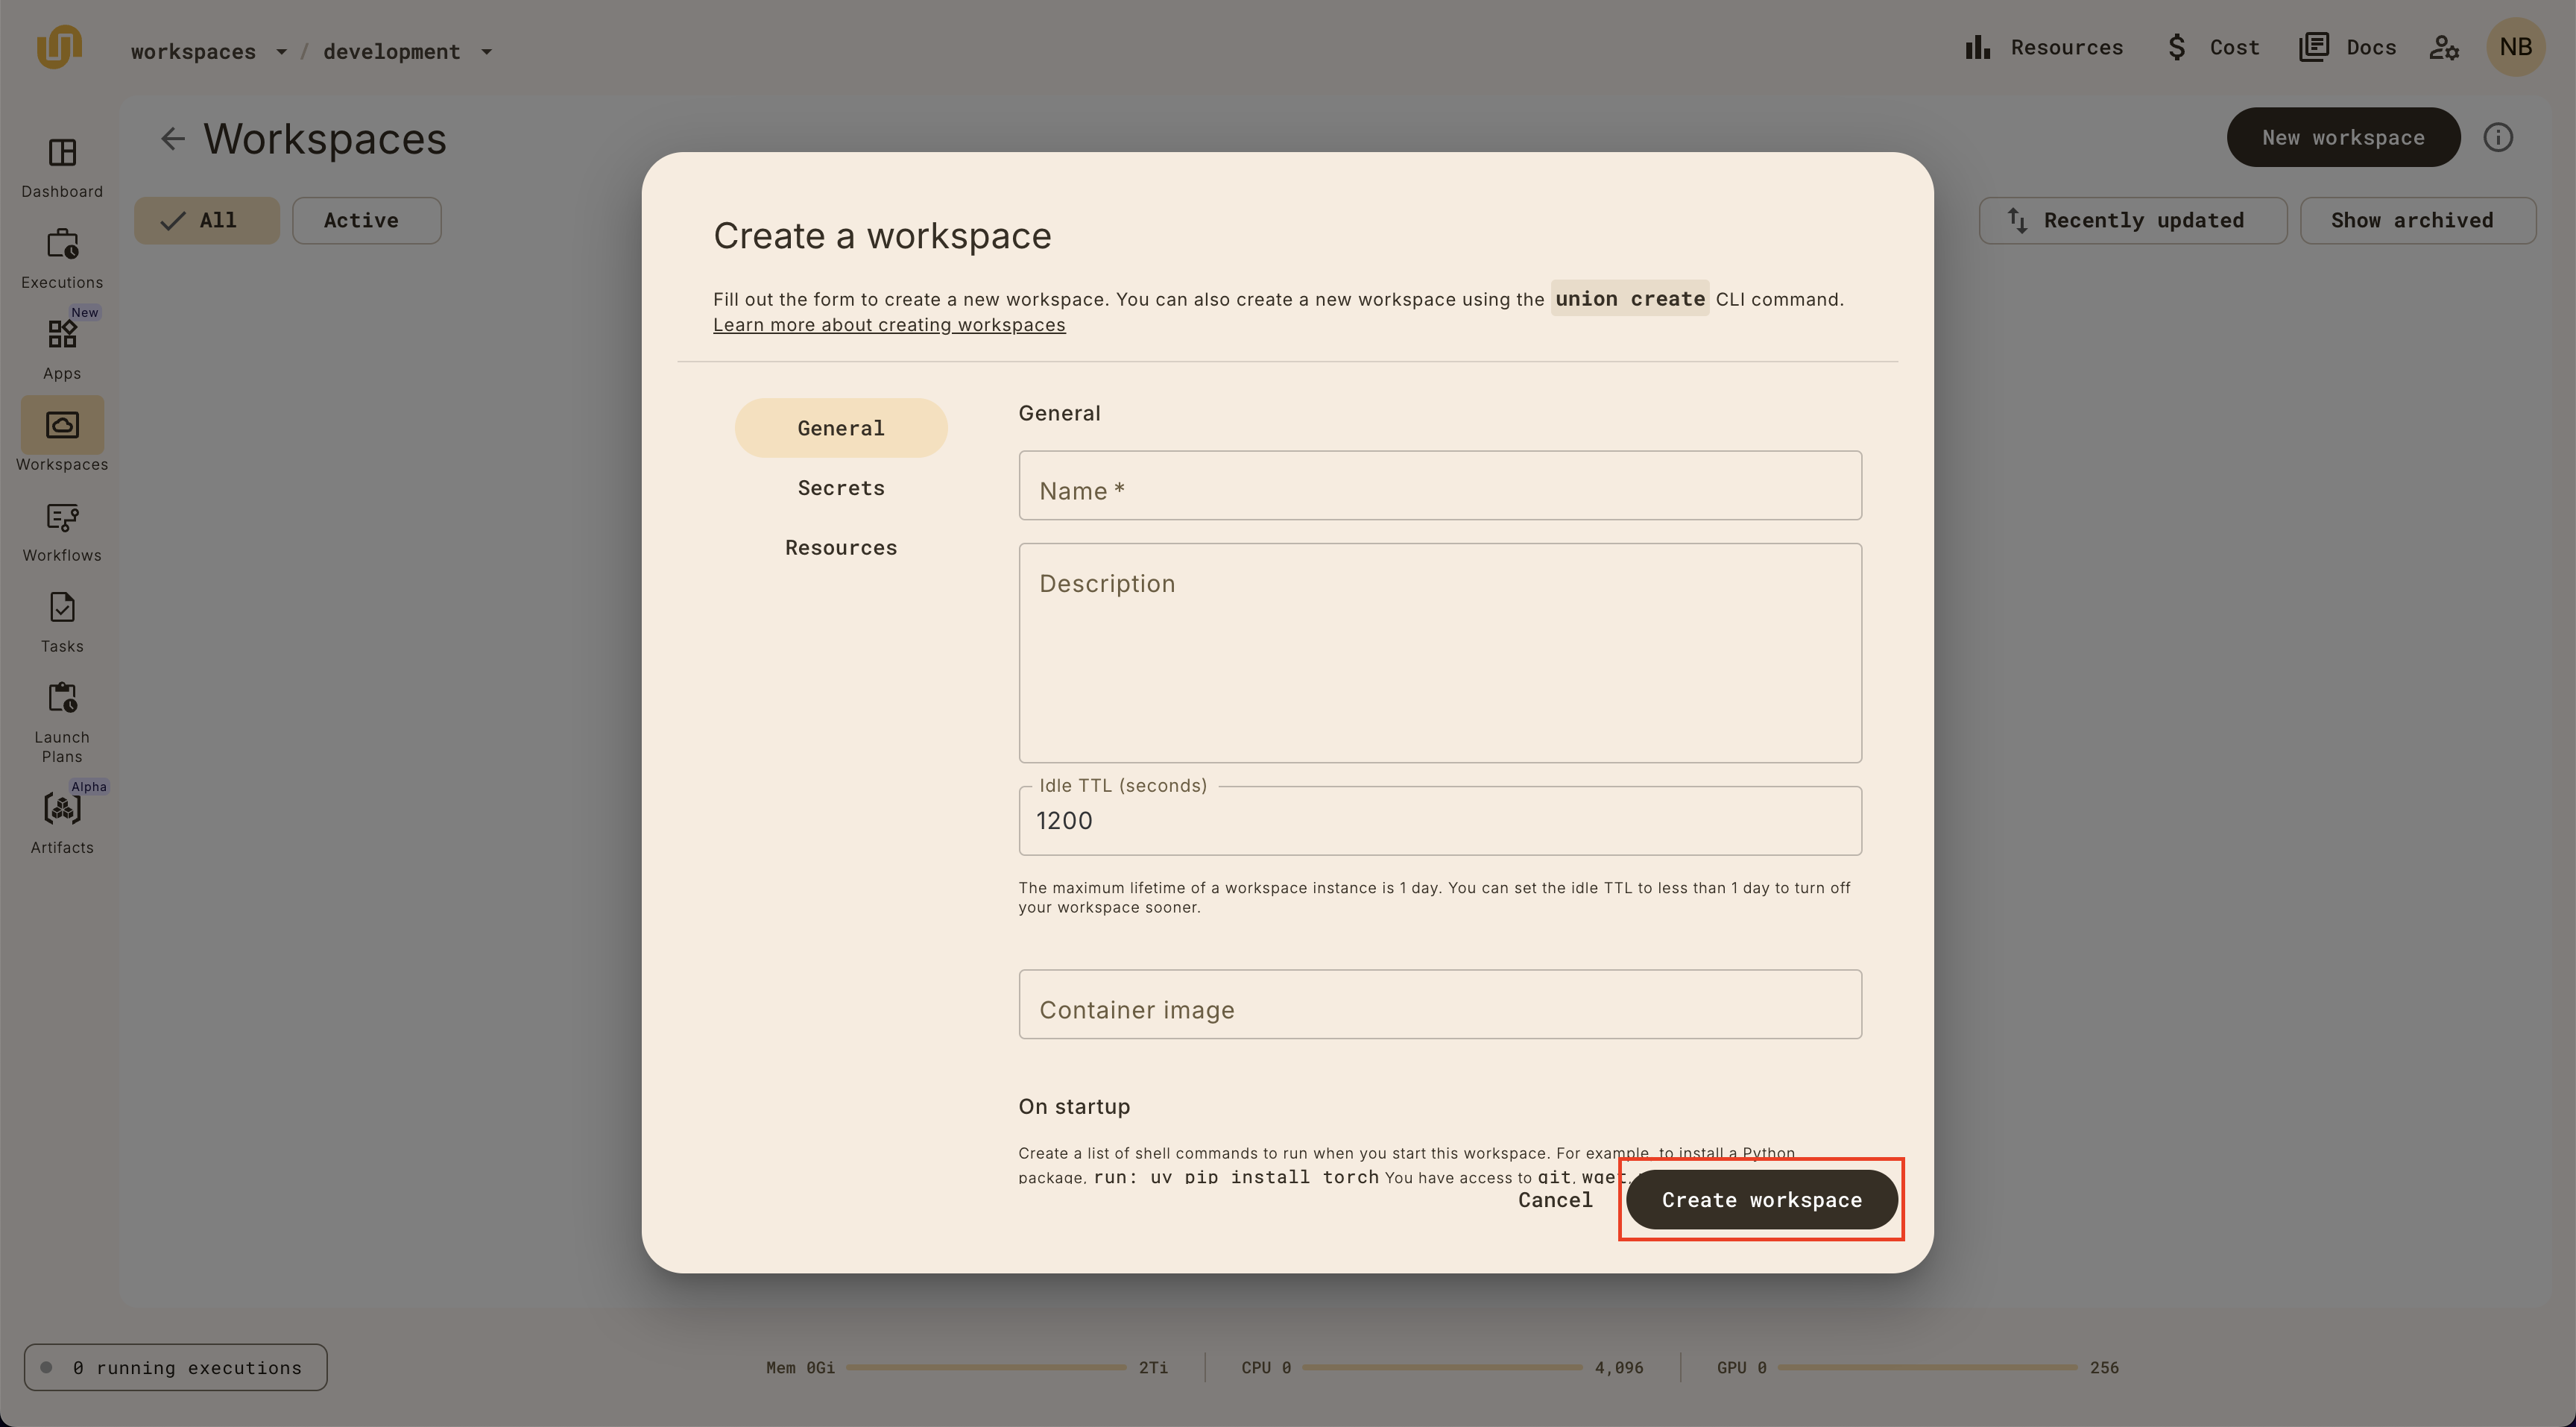
The Idle TTL is the amount of time a workspace will be idle before it is automatically stopped. Workspaces have a global TTL of 1 day, but you can set the idle TTL field to a shorter duration to stop the workspace sooner.
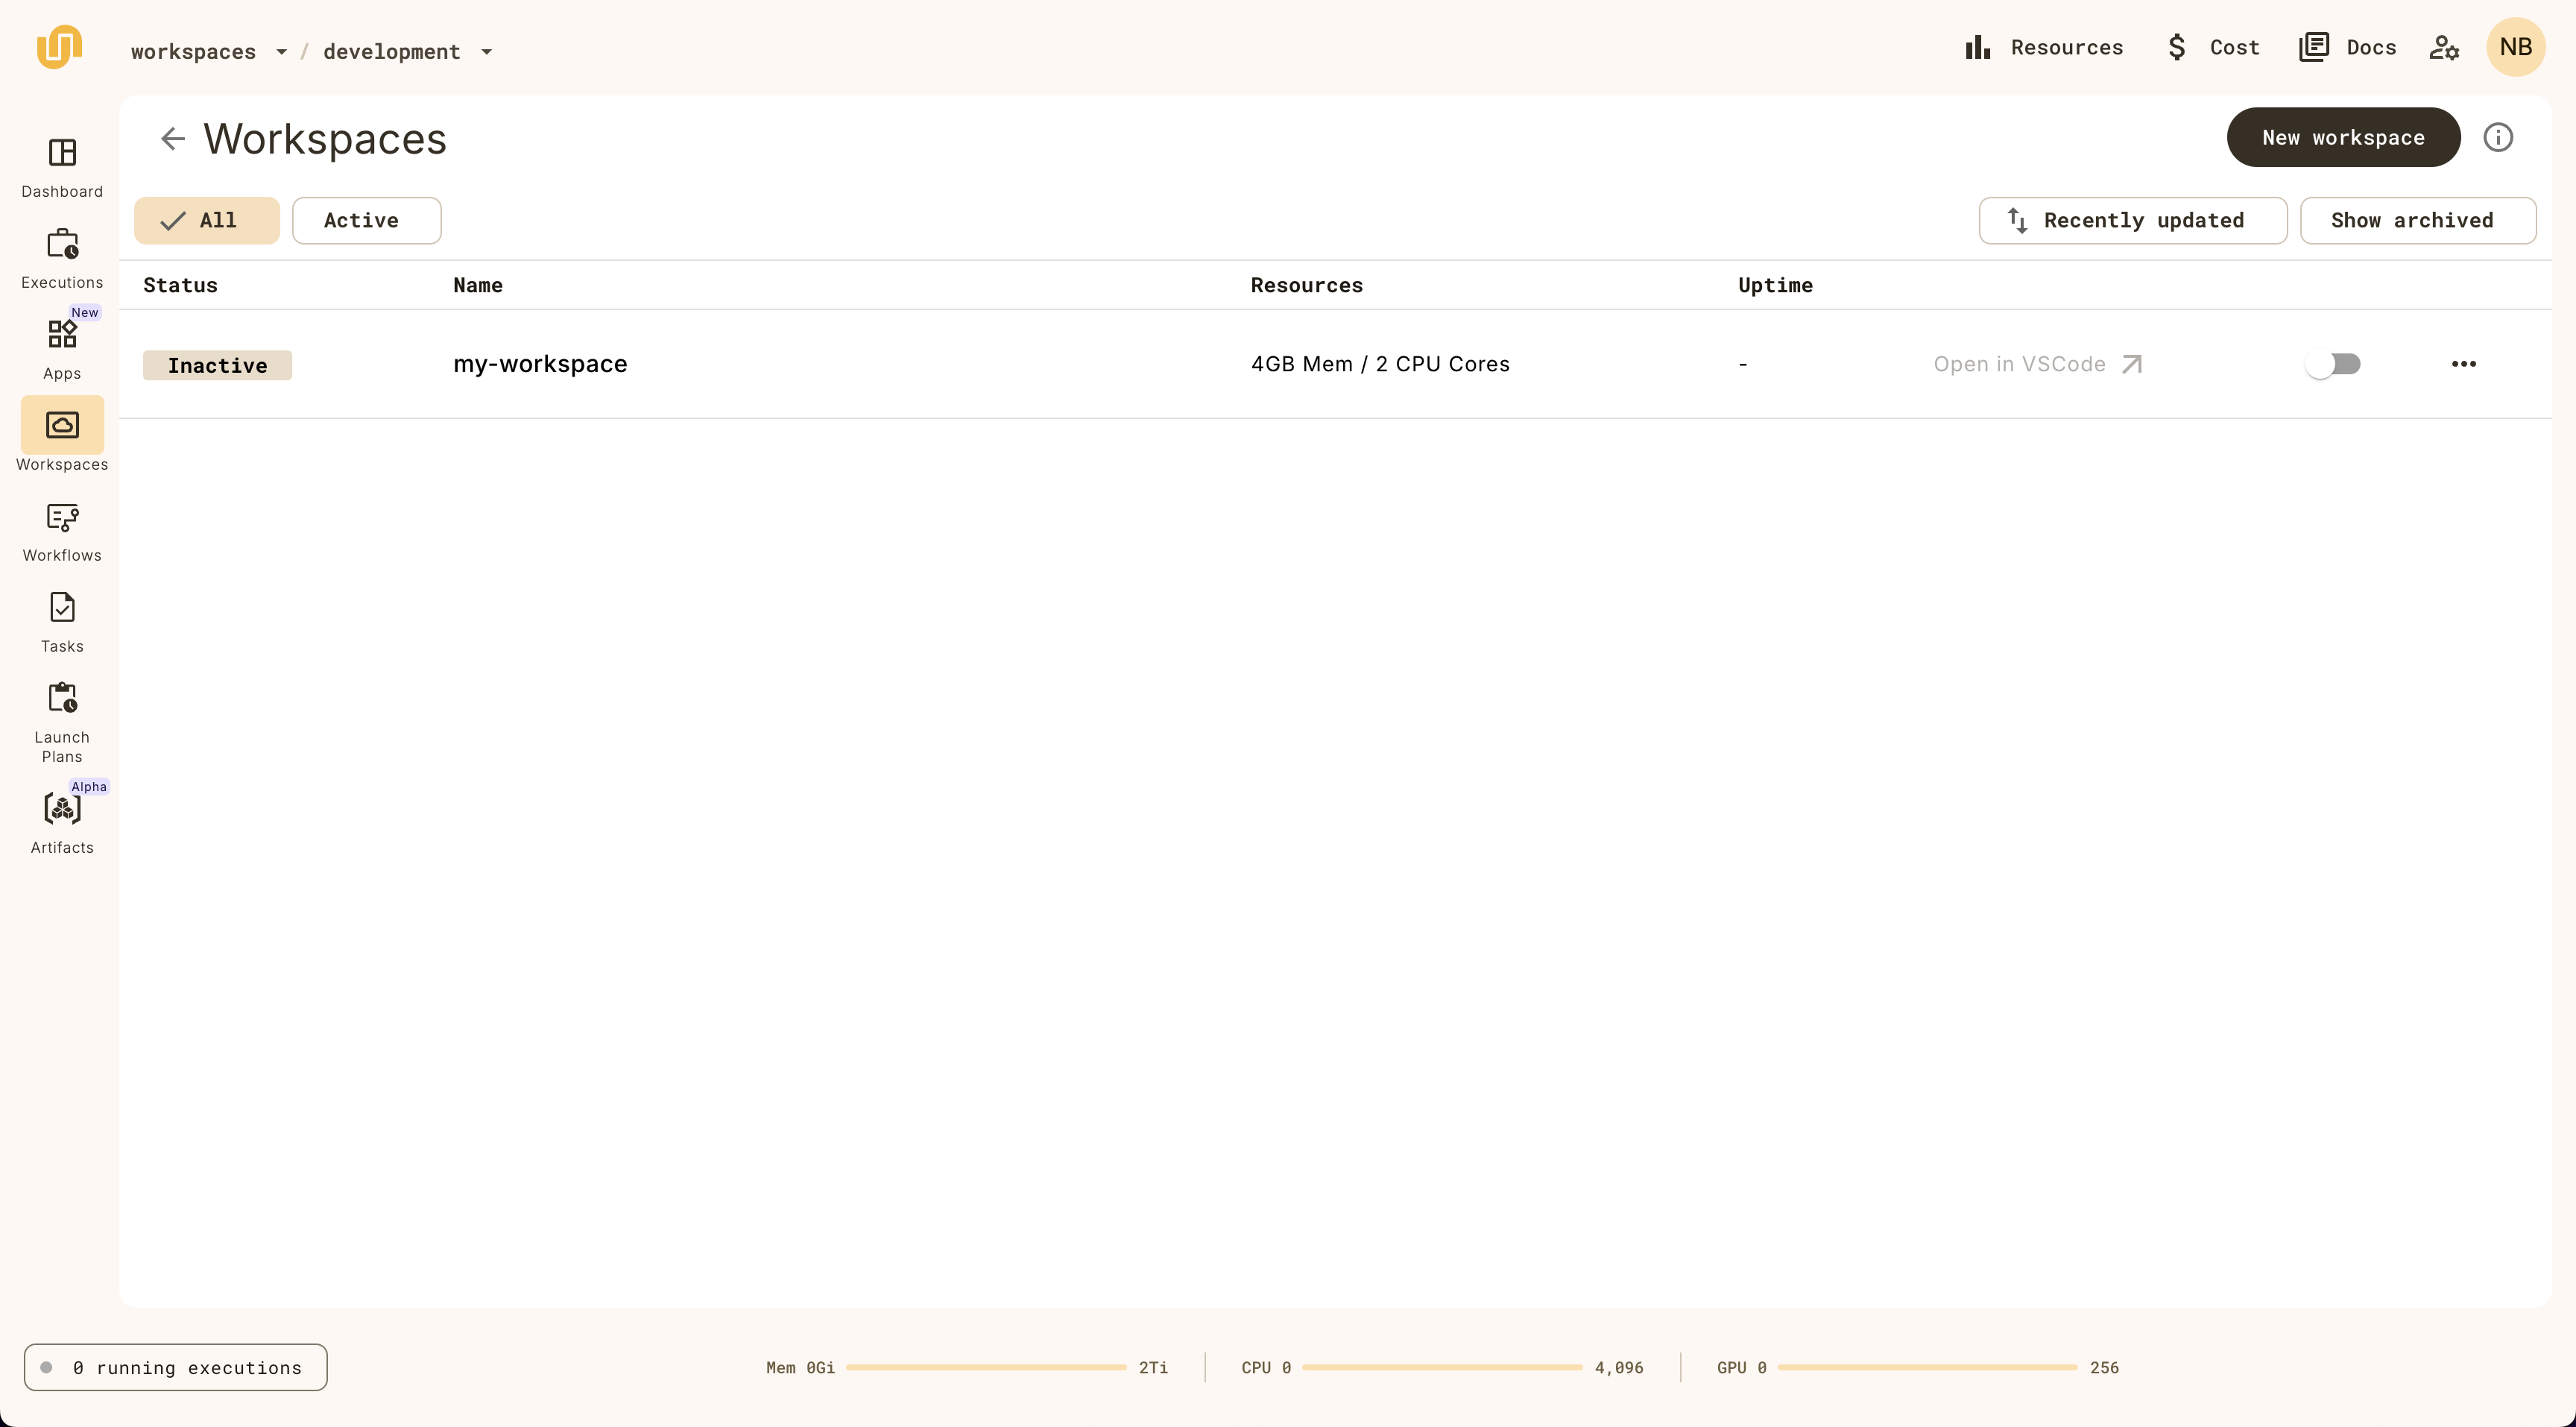
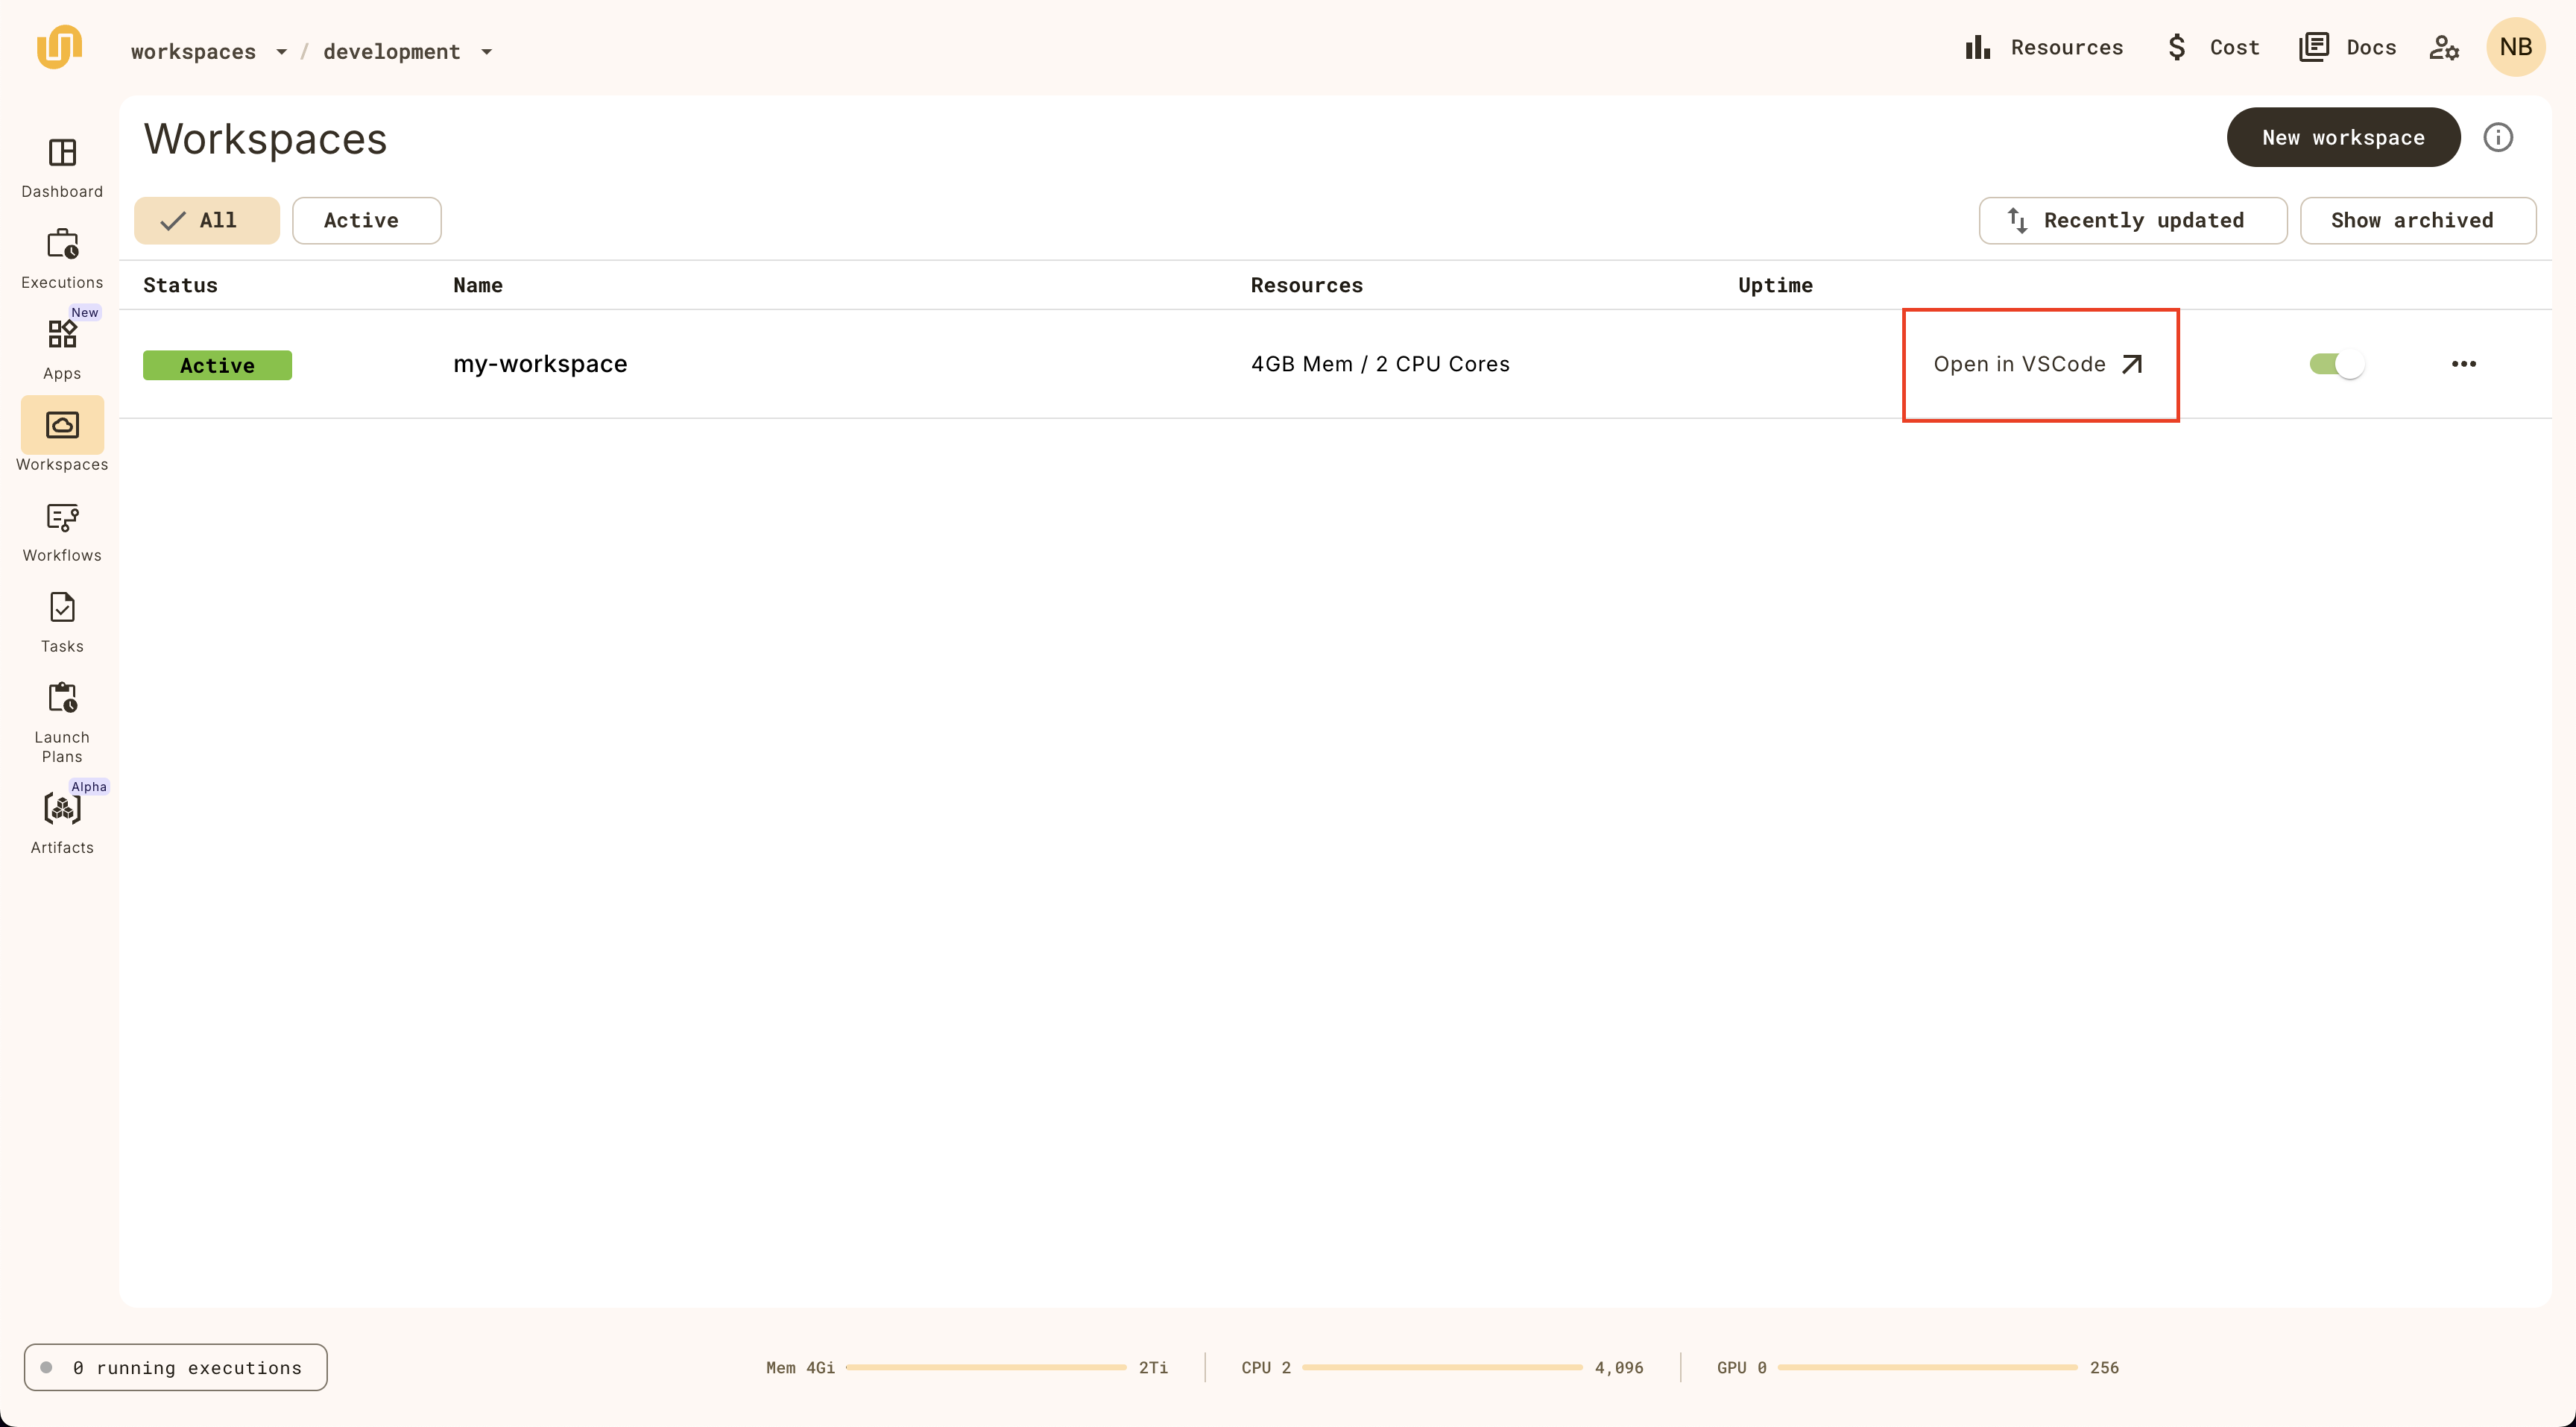
You should see a new workspace created in the Workspaces view:
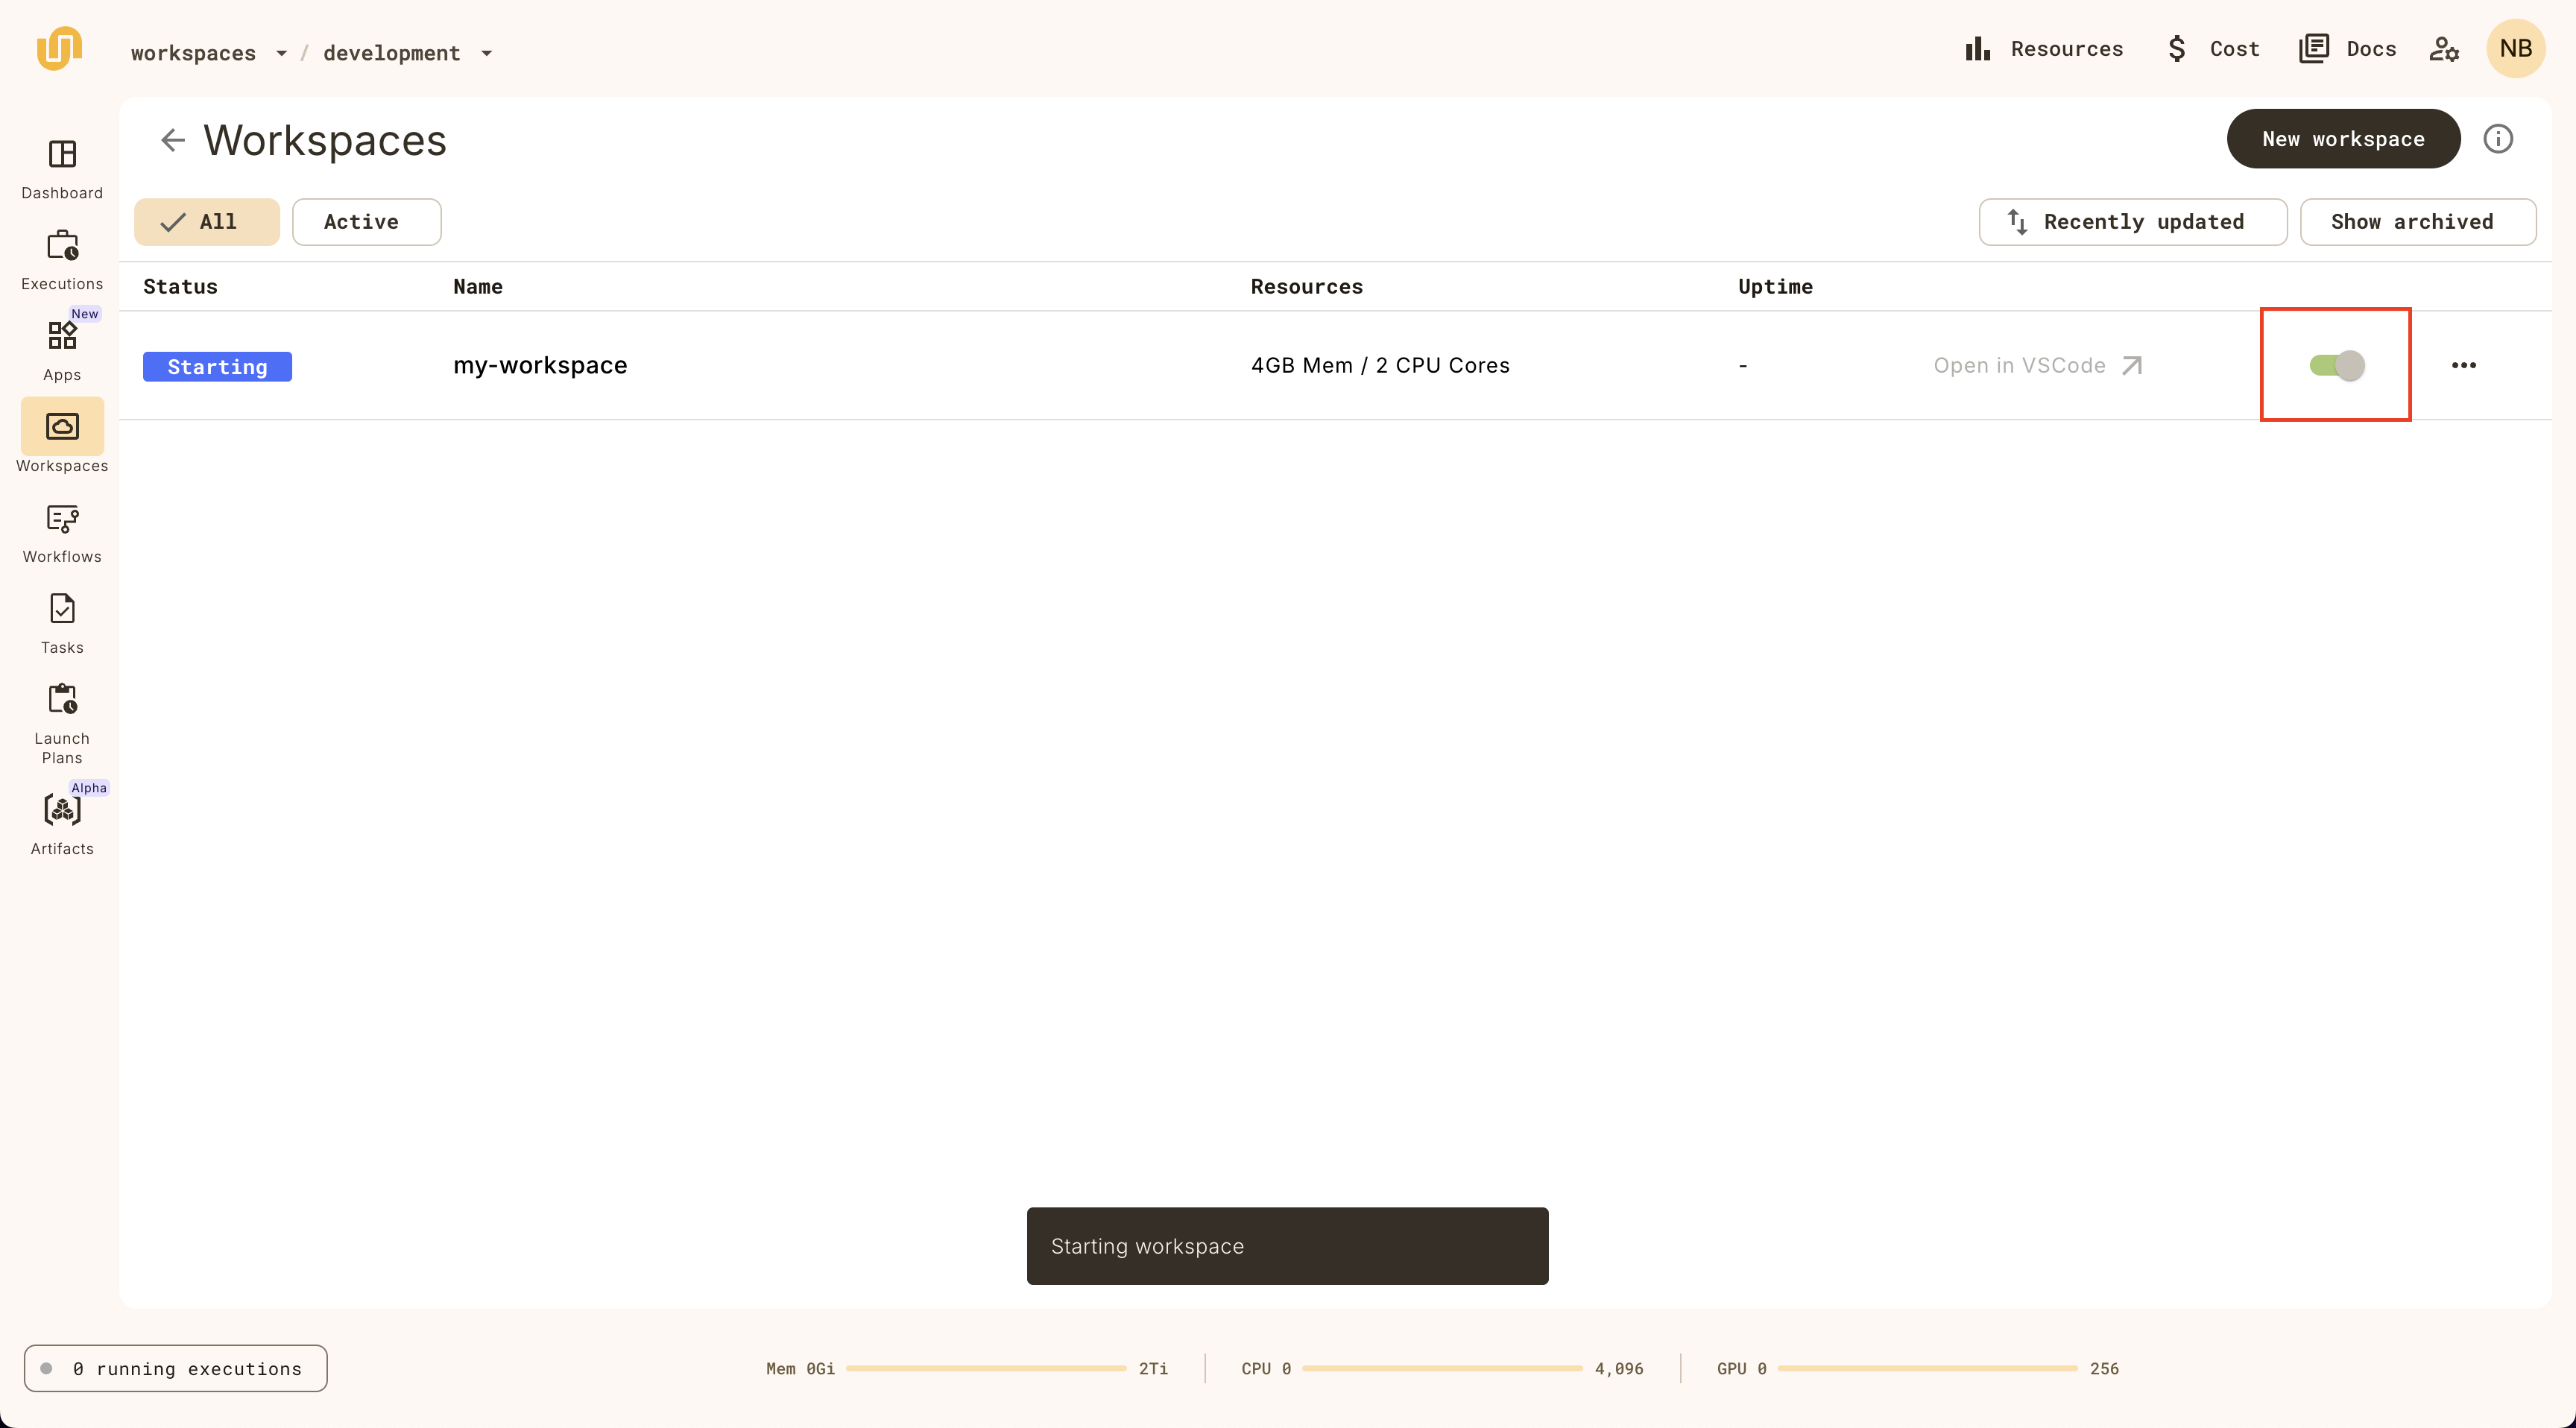
Running a workspace
To run a workspace, click on the switch on the workspace item:
Once the workspace has started, you can click on the Open in VSCode button:
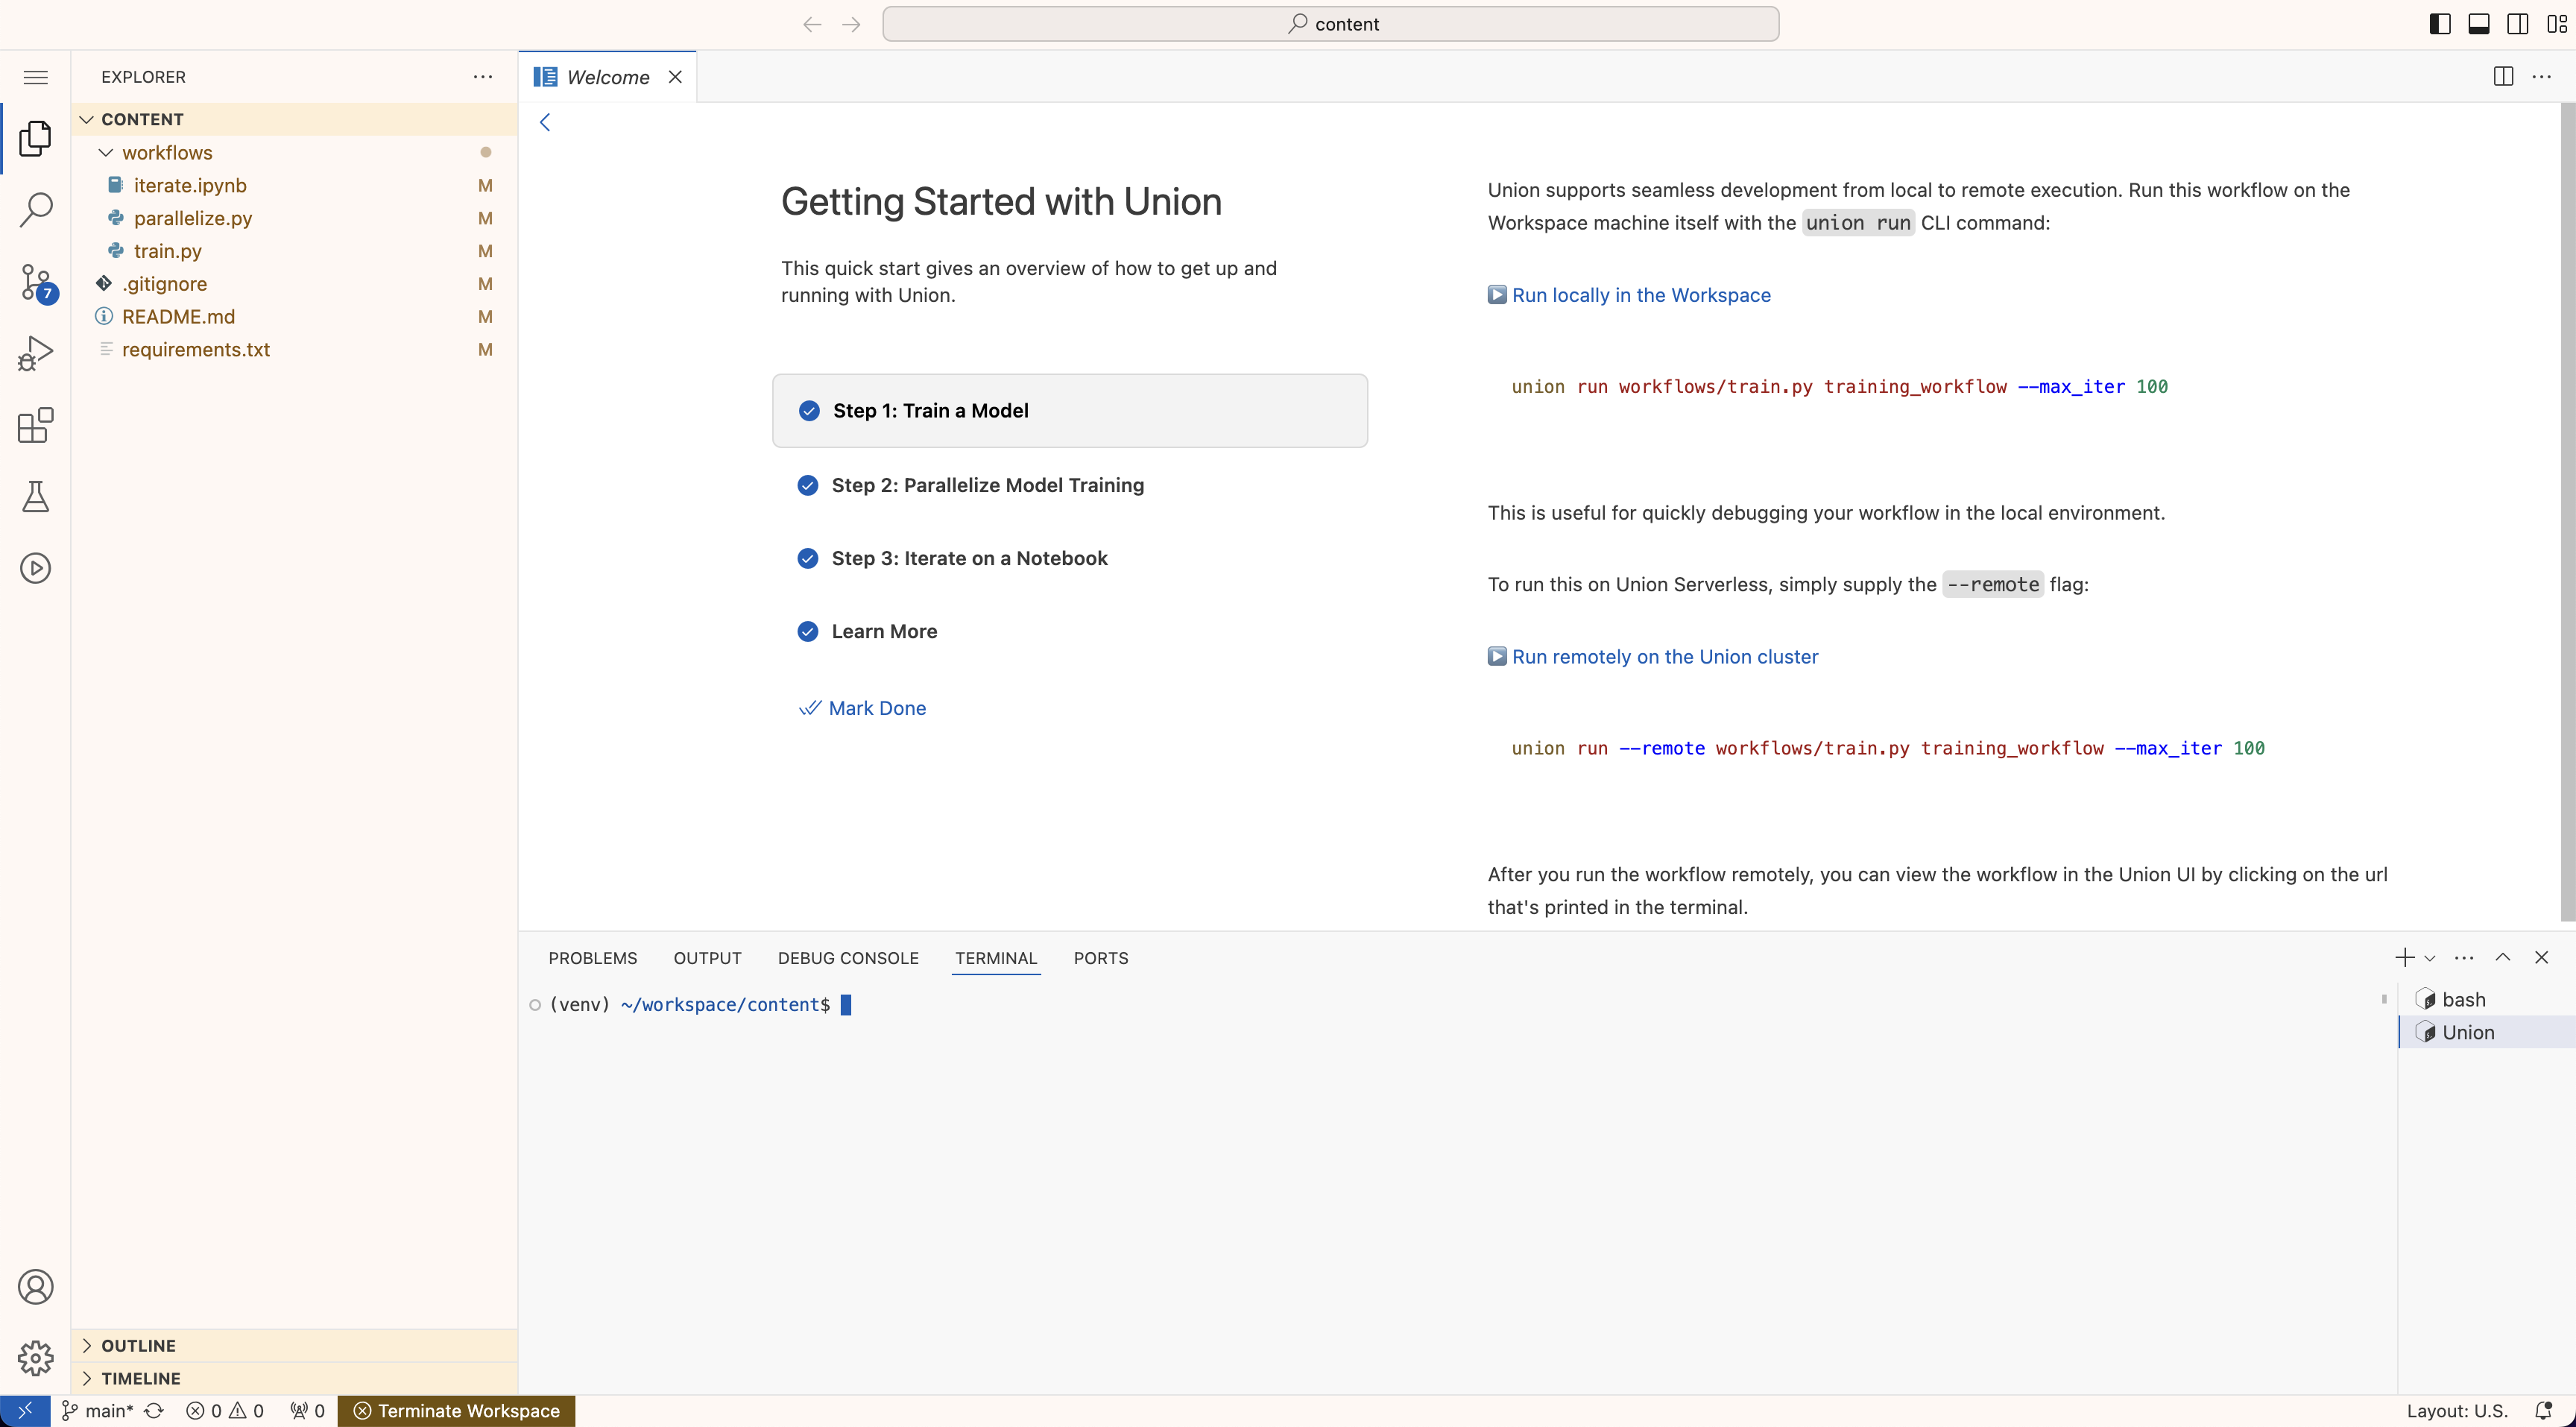
Once the startup commands have completed, you’ll see a browser-based VSCode IDE:
To stop a workspace, click on the toggle switch on the workspace item.
Filesystem persistence
Any changes to the filesystem that you make in the working directory of your workspace (the directory you find yourself in when you first open the workspace) are persisted across workspace restarts.
This allows you to save data, code, models, and other files in your workspace.
Storing large datasets, models, and other files in your workspace may slow down the start and stop times of your workspace. This is because the workspace instance needs time to download/upload the files from persistent storage.
Editing a workspace
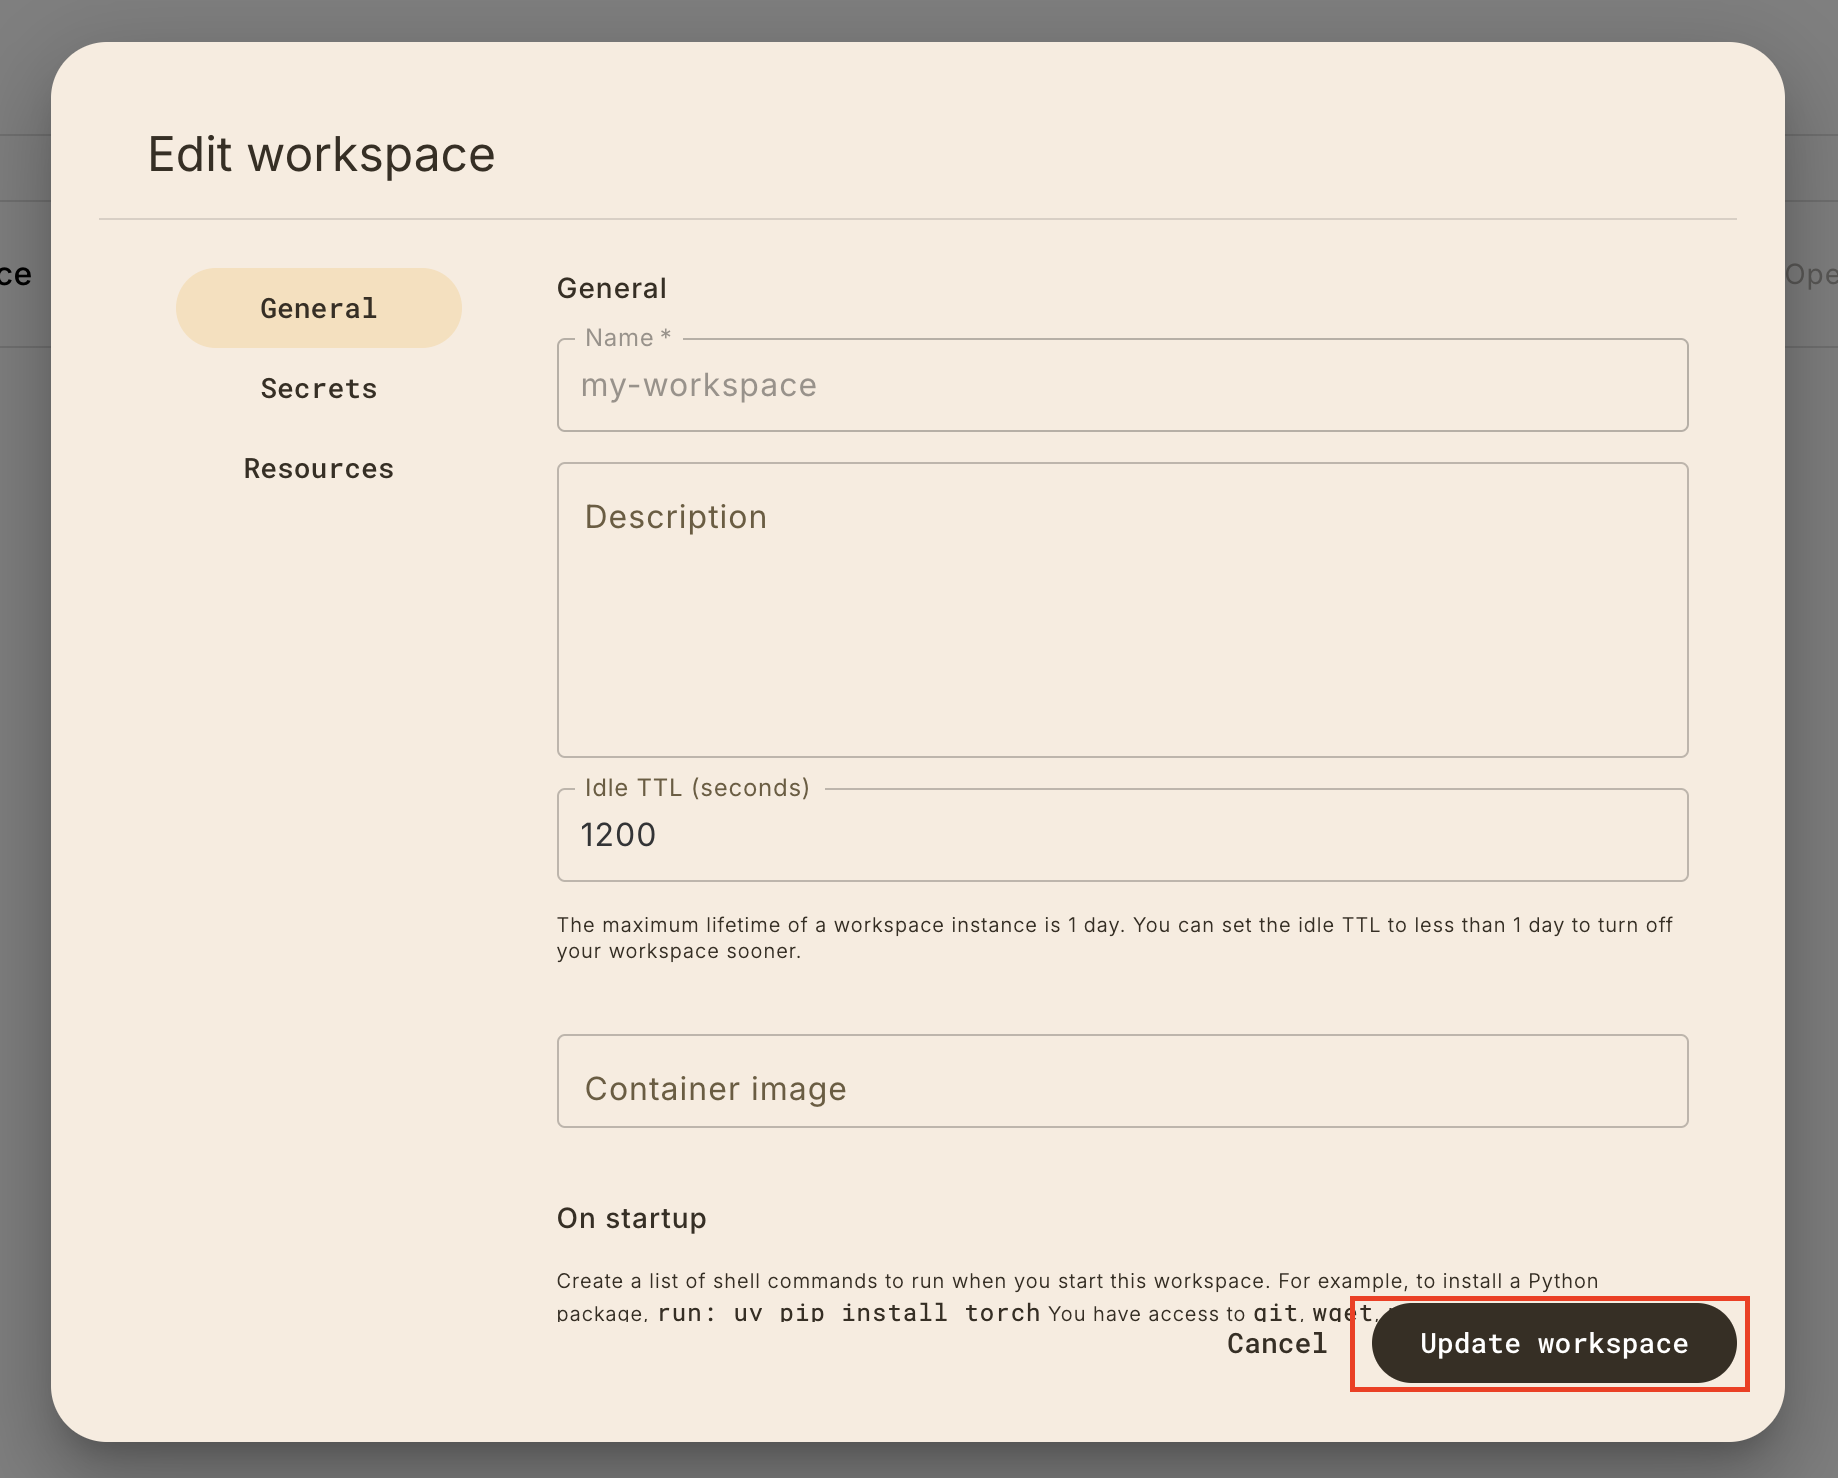
Change the workspace configuration by clicking on the Edit button:
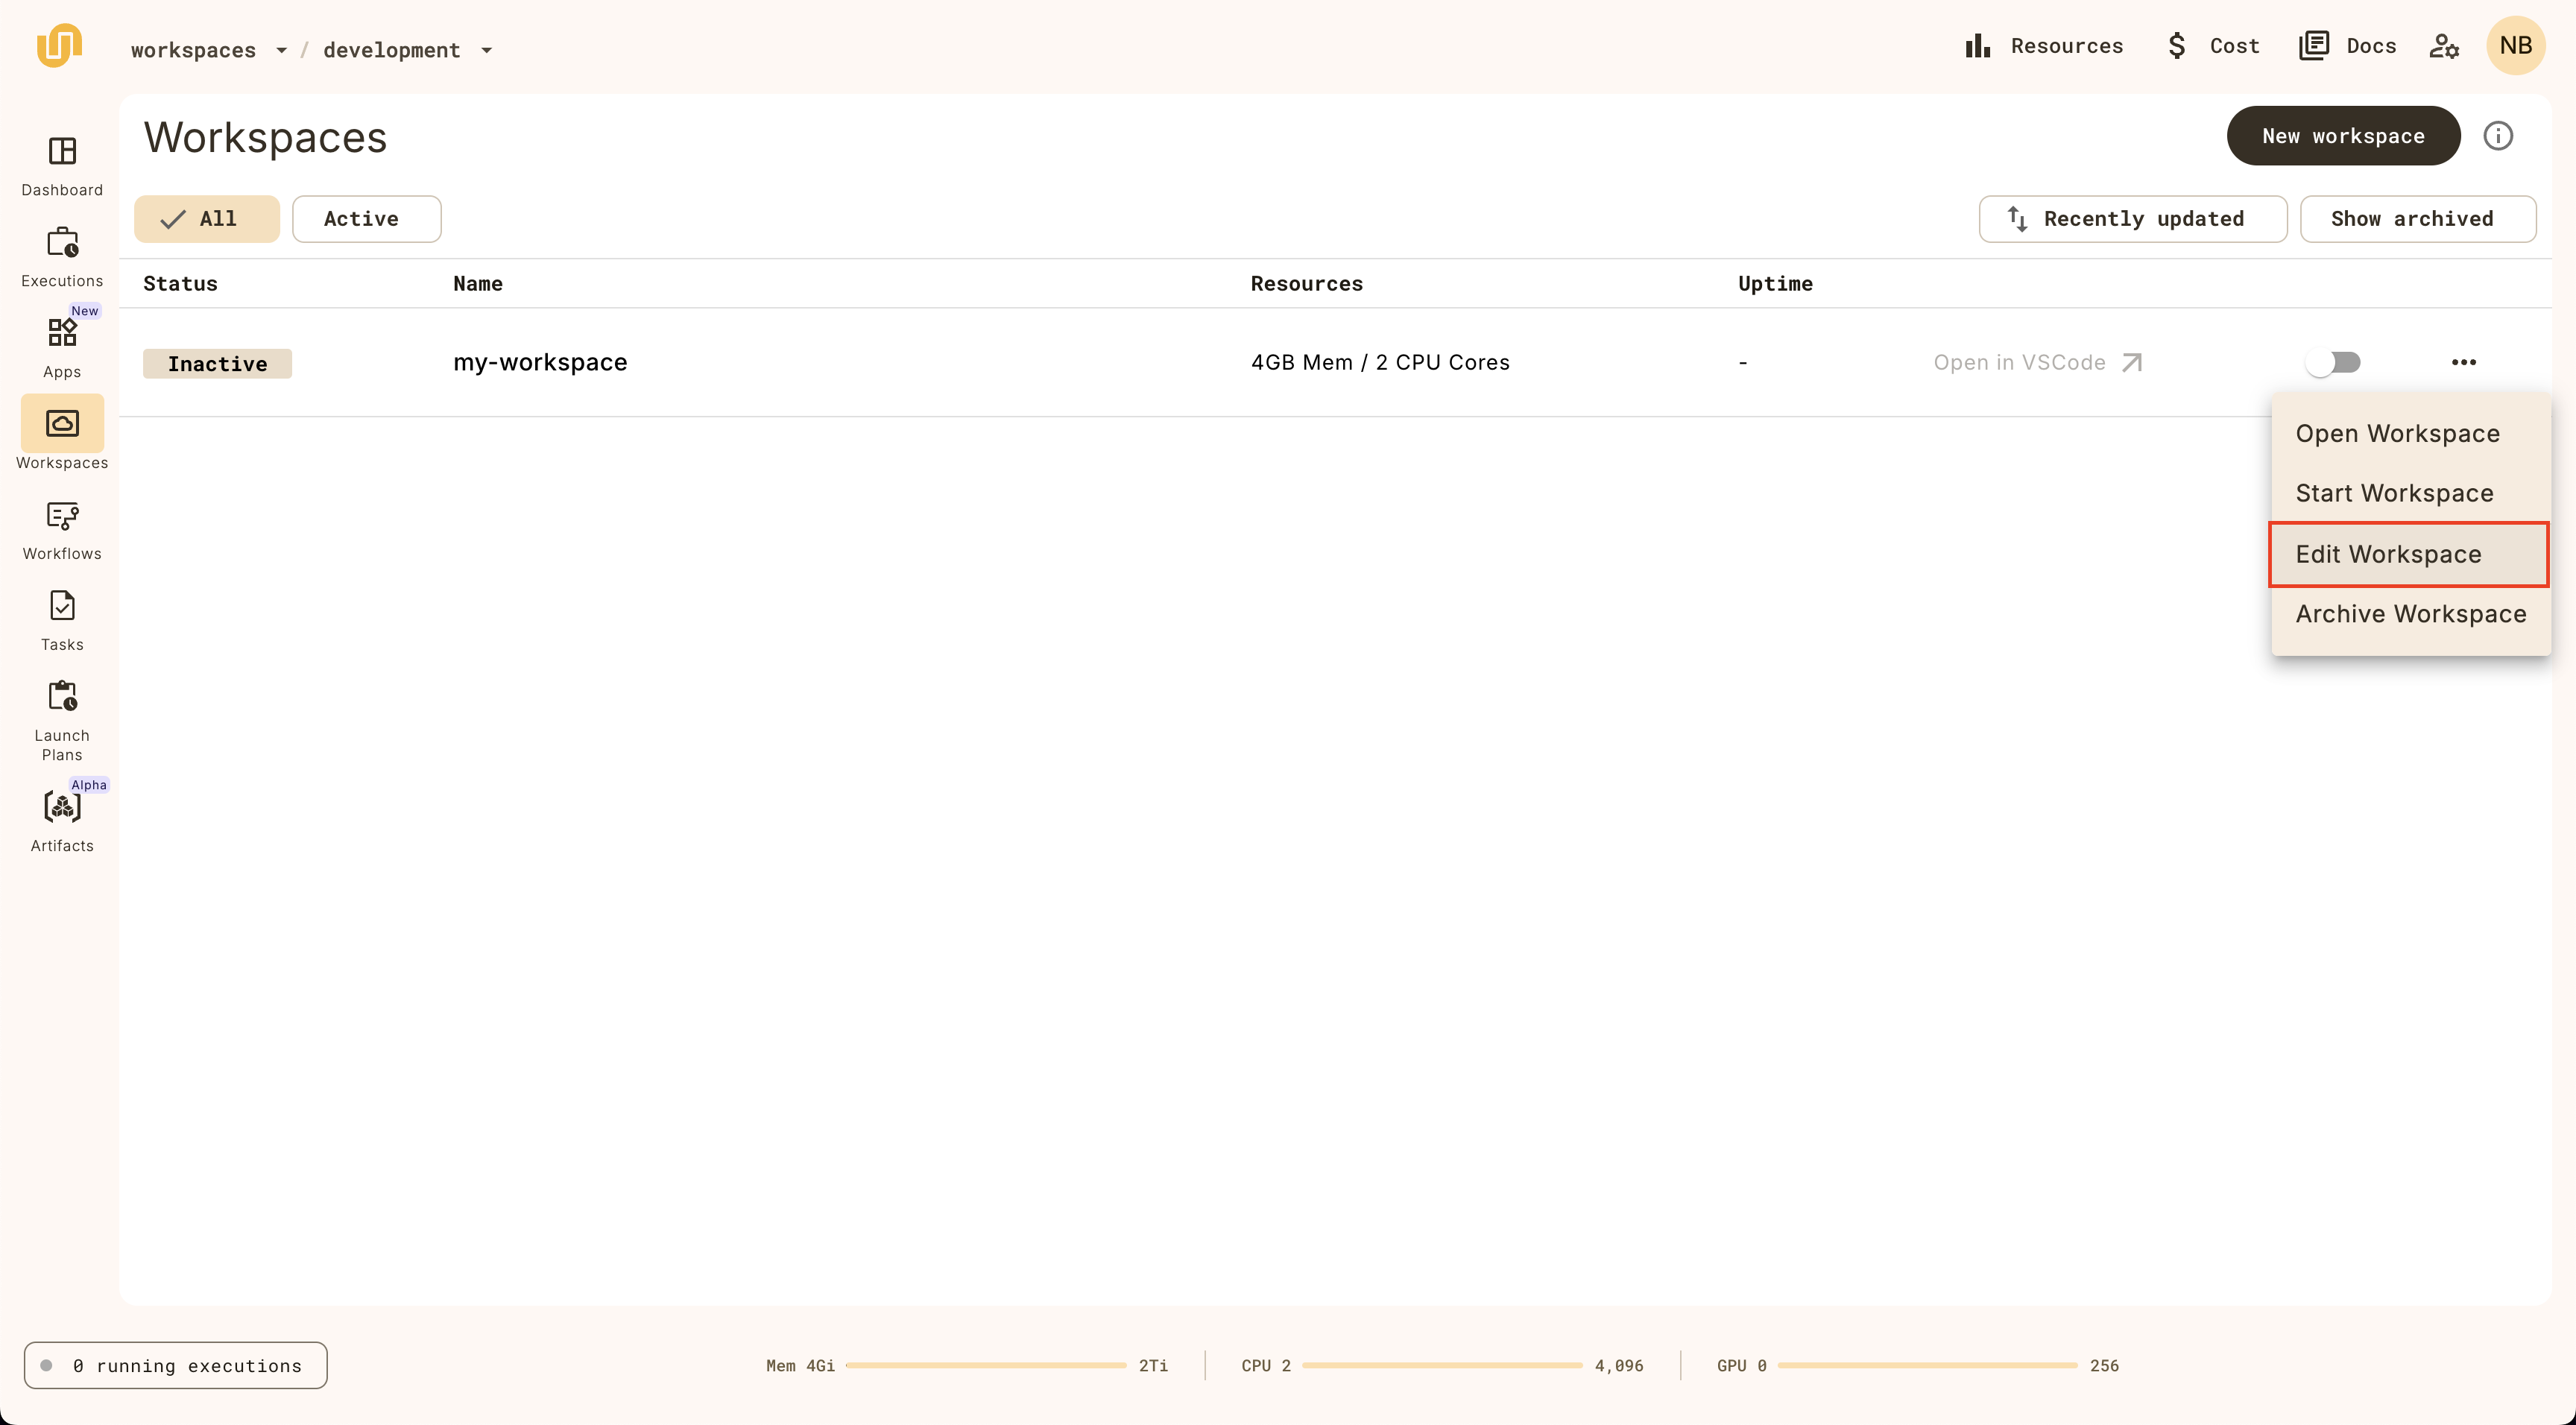
Note that you can change everything except the workspace name.
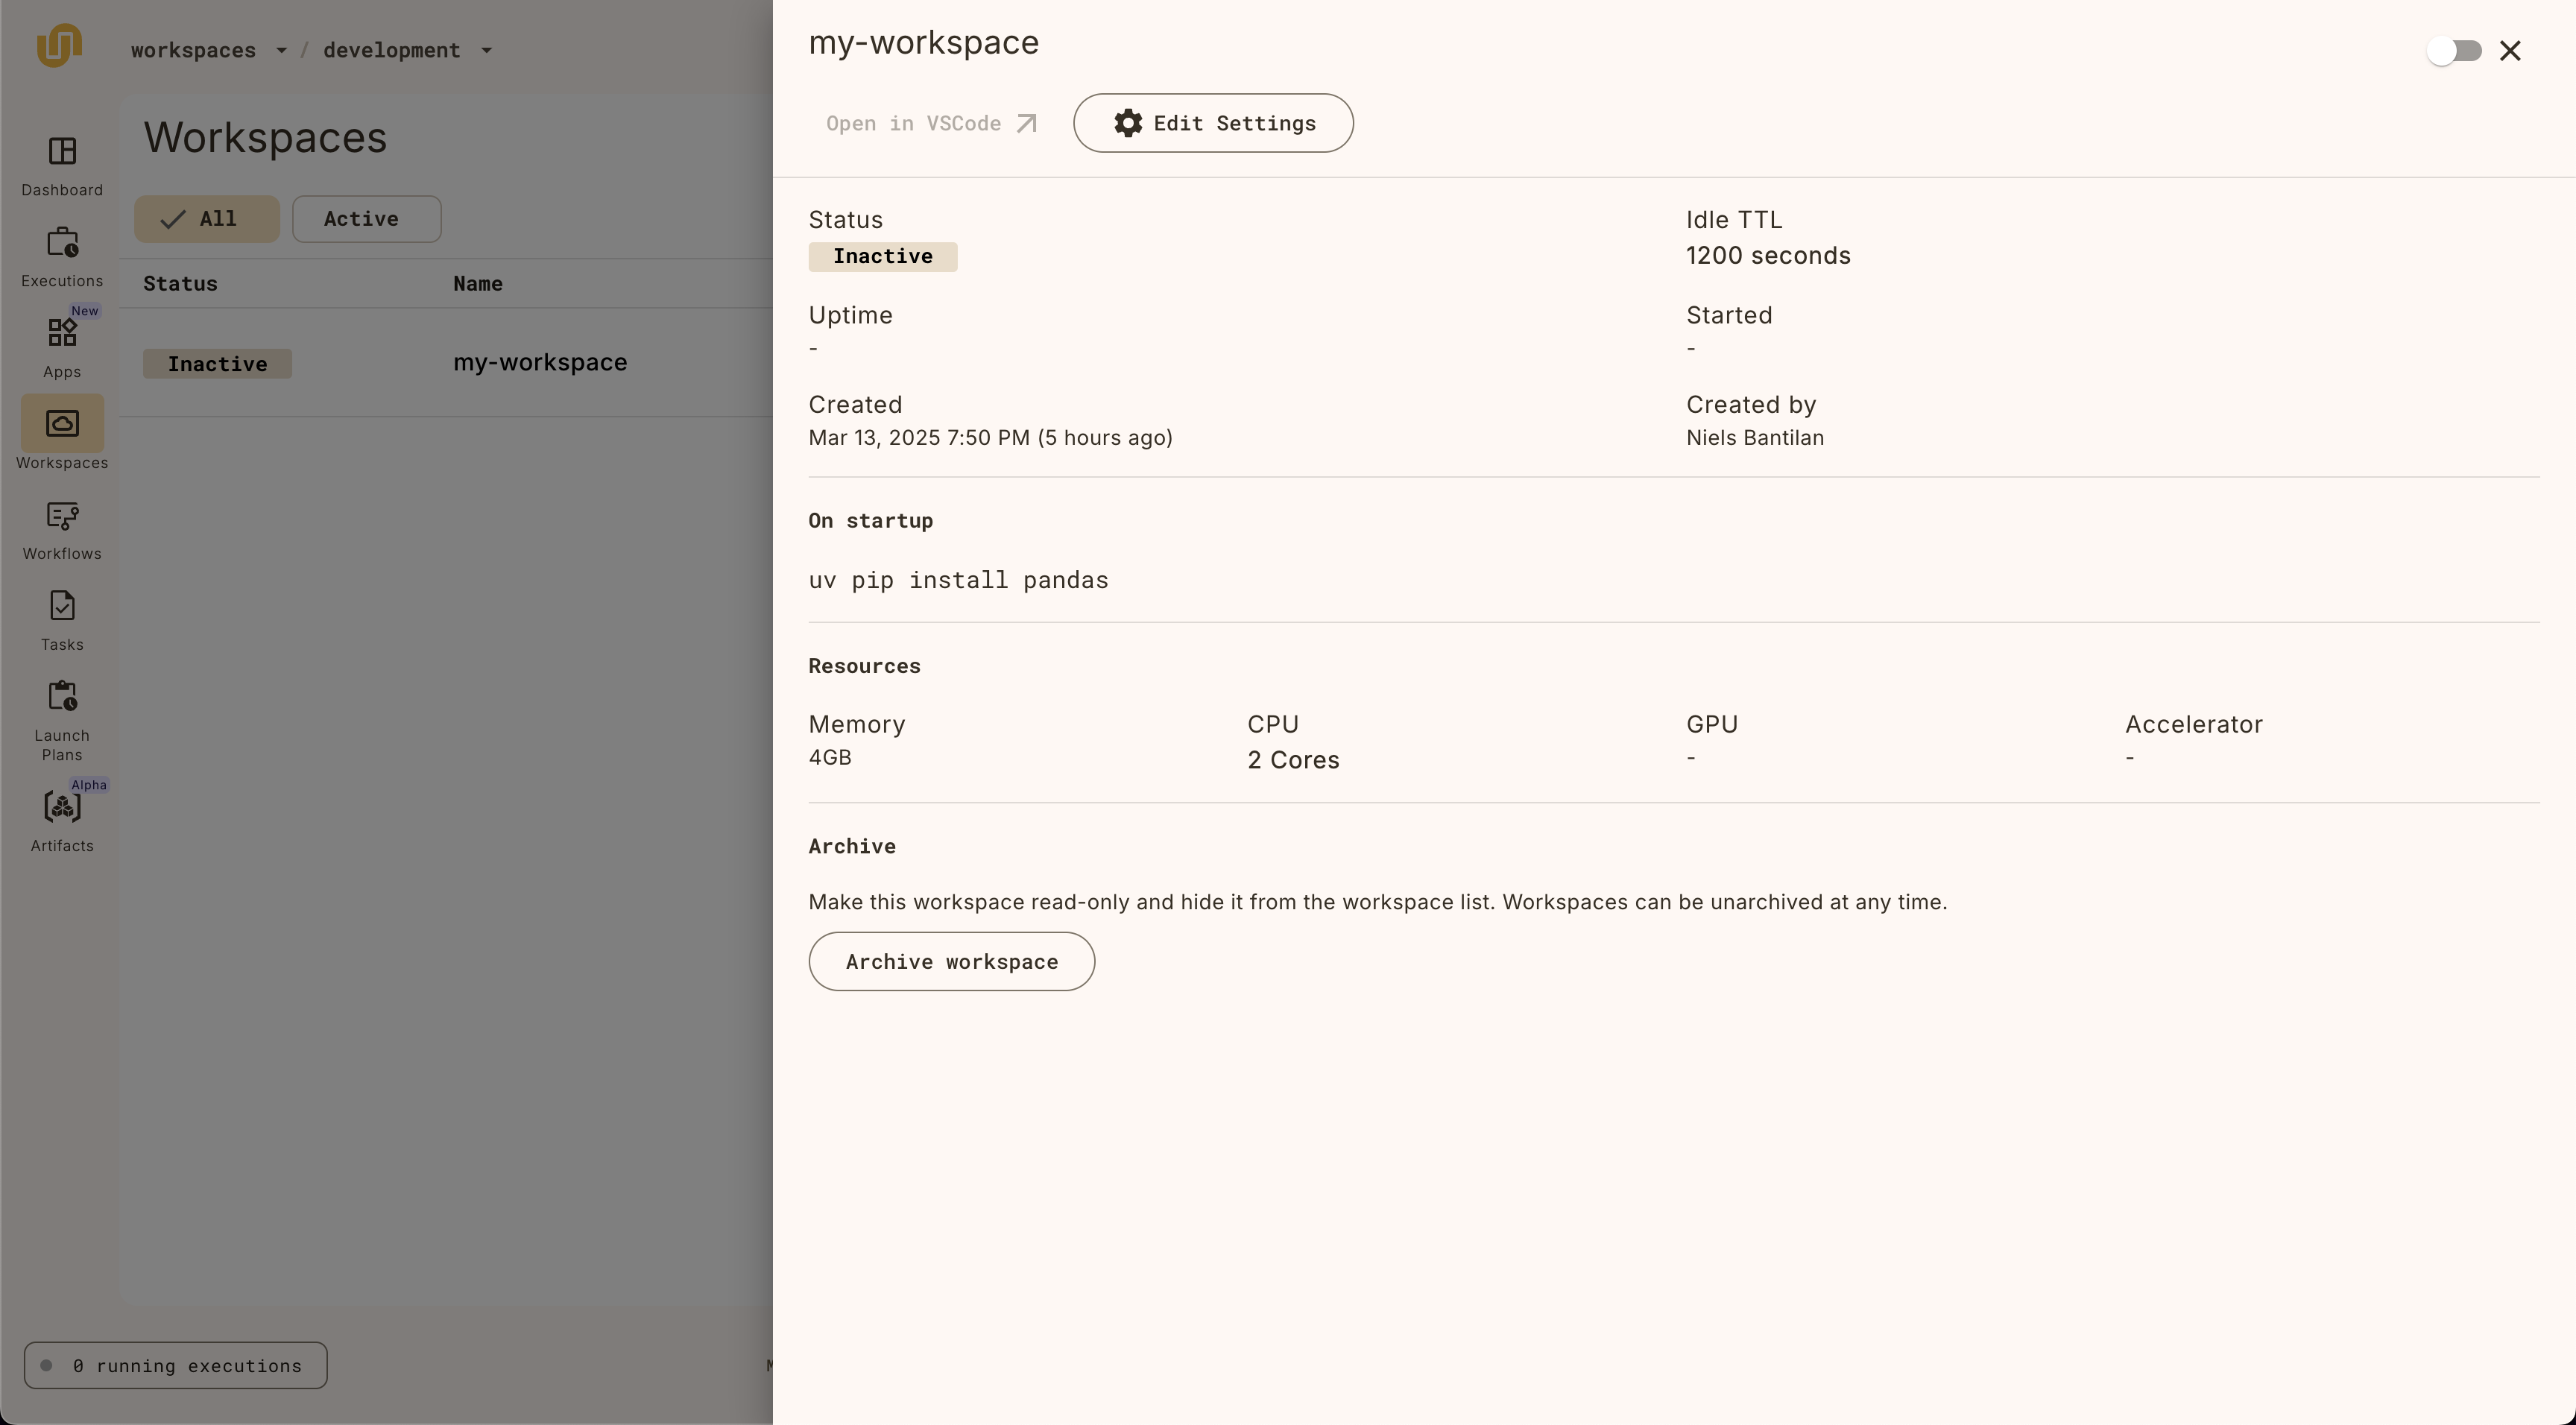
The workspace detail view
Clicking on the workspace item on the list view will reveal the workspace detail view, which provides all the information about the workspace.
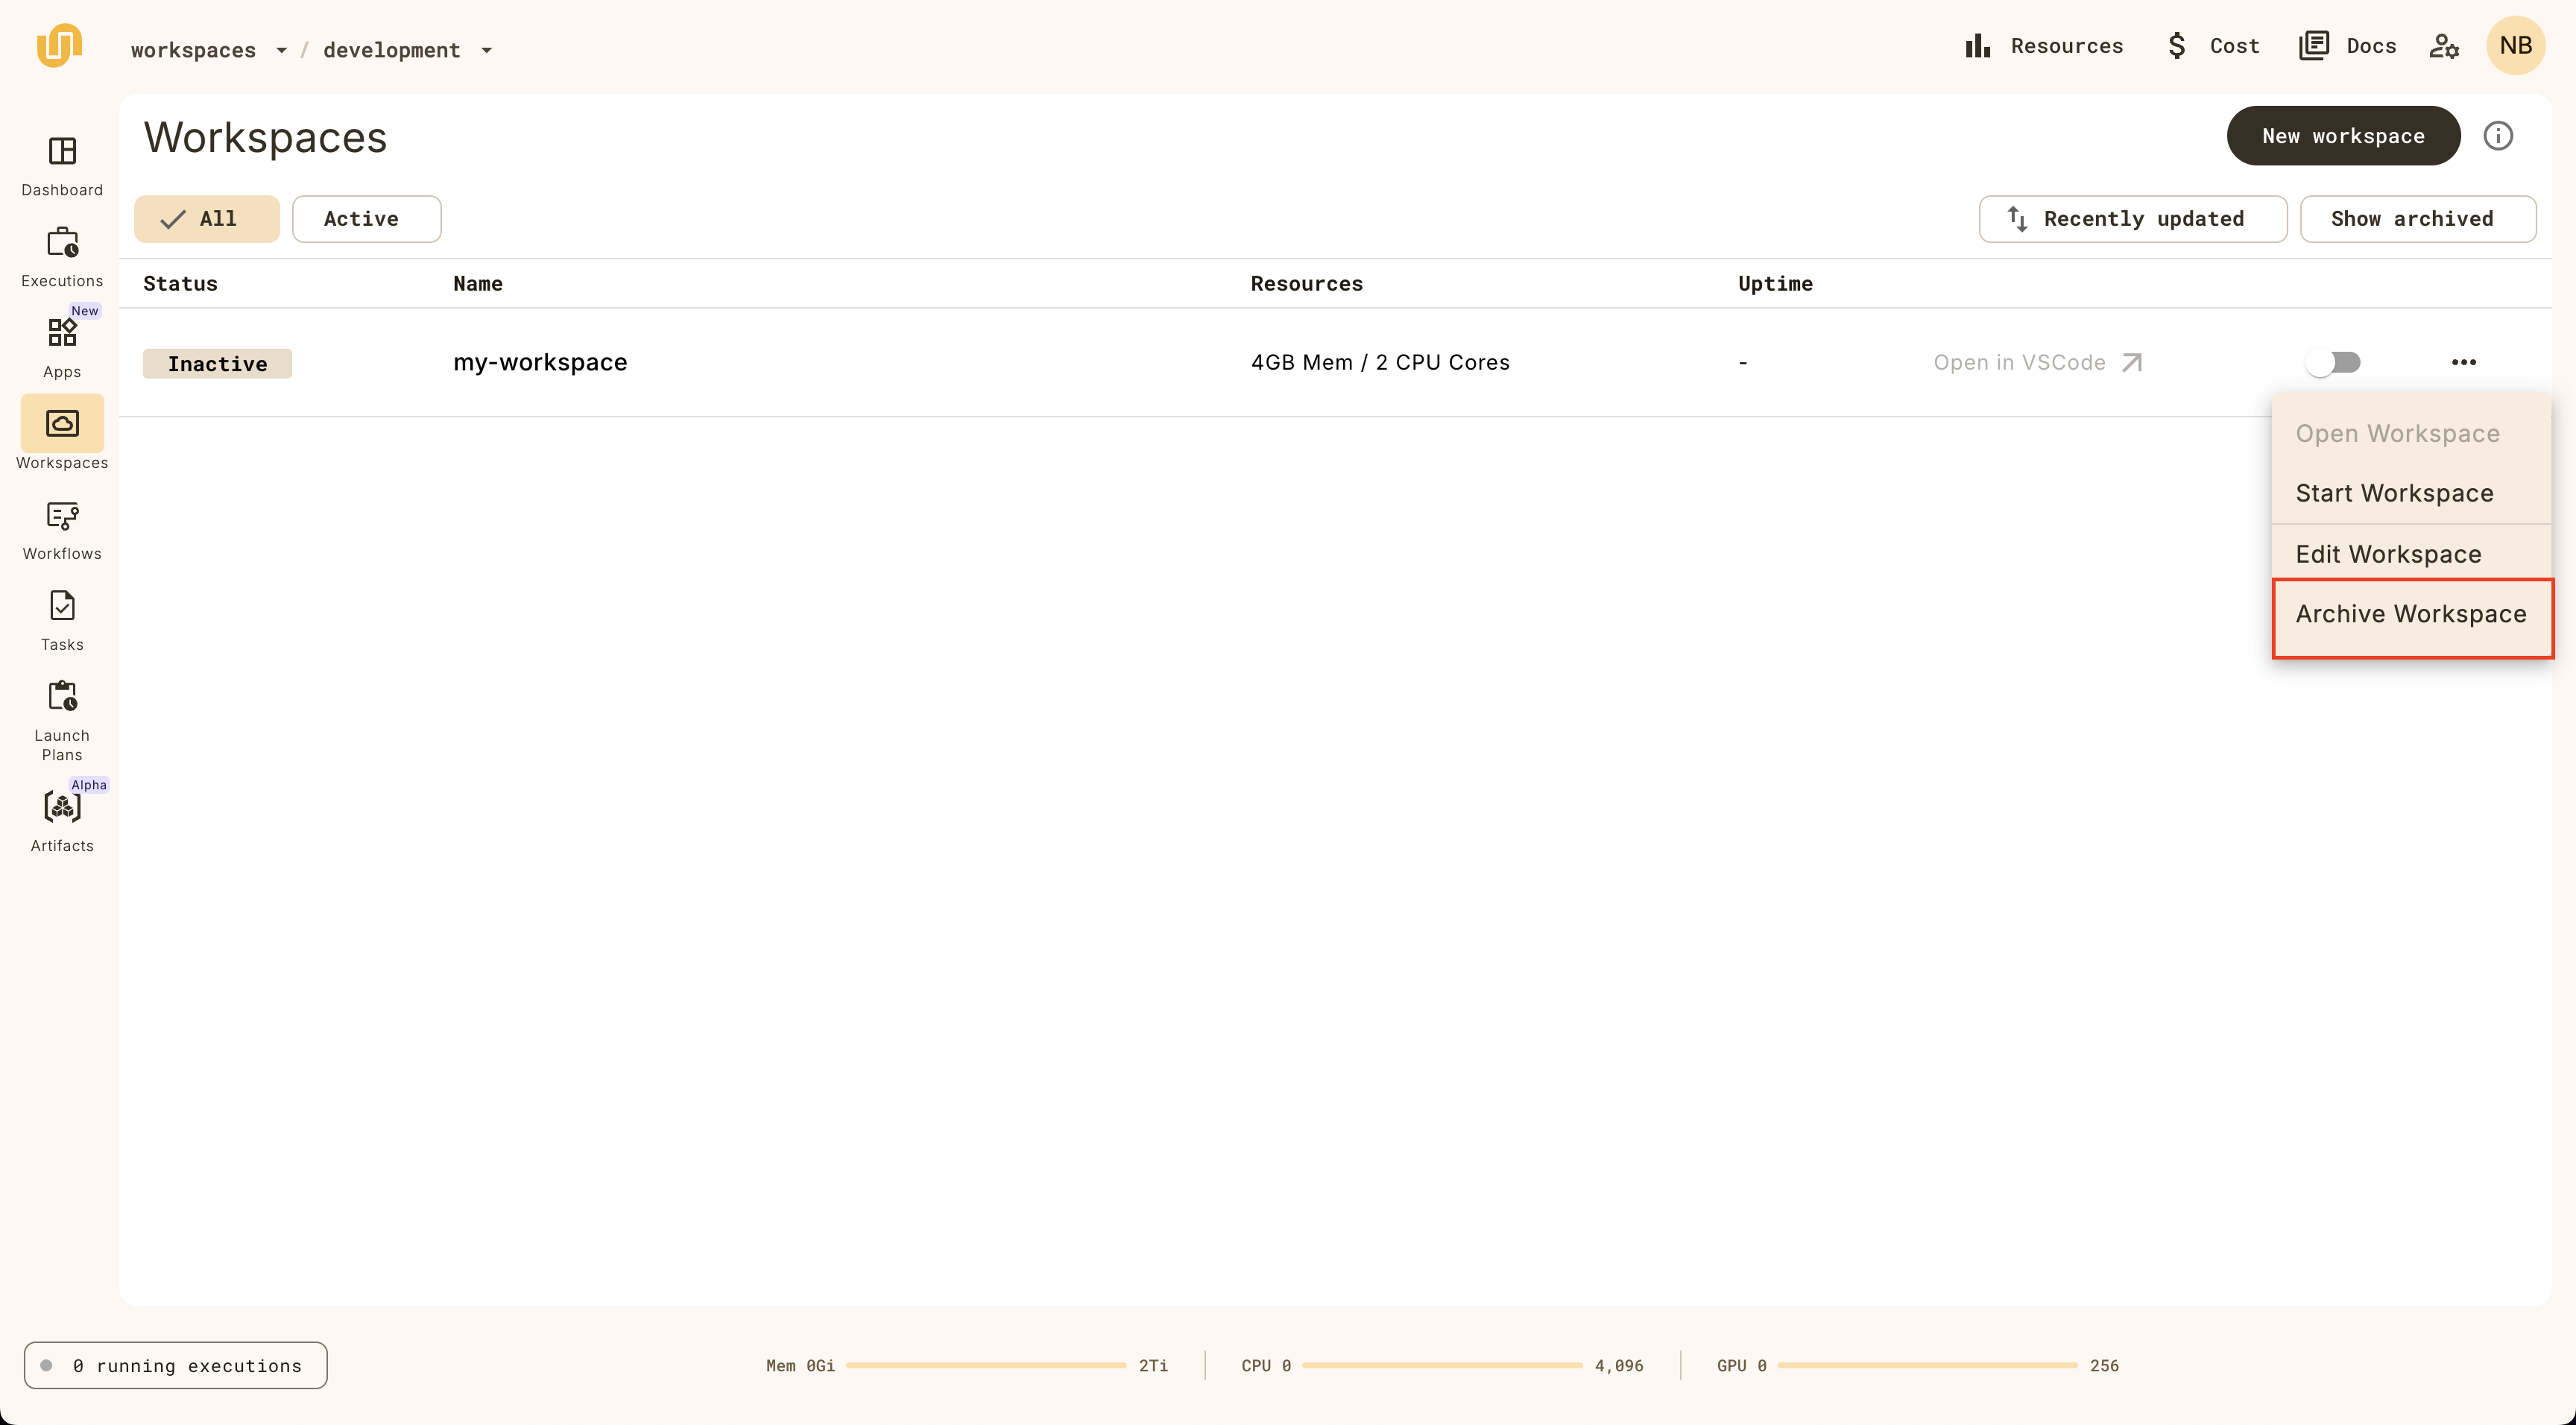
Archiving a workspace
Archive a workspace by clicking on the Archive button:
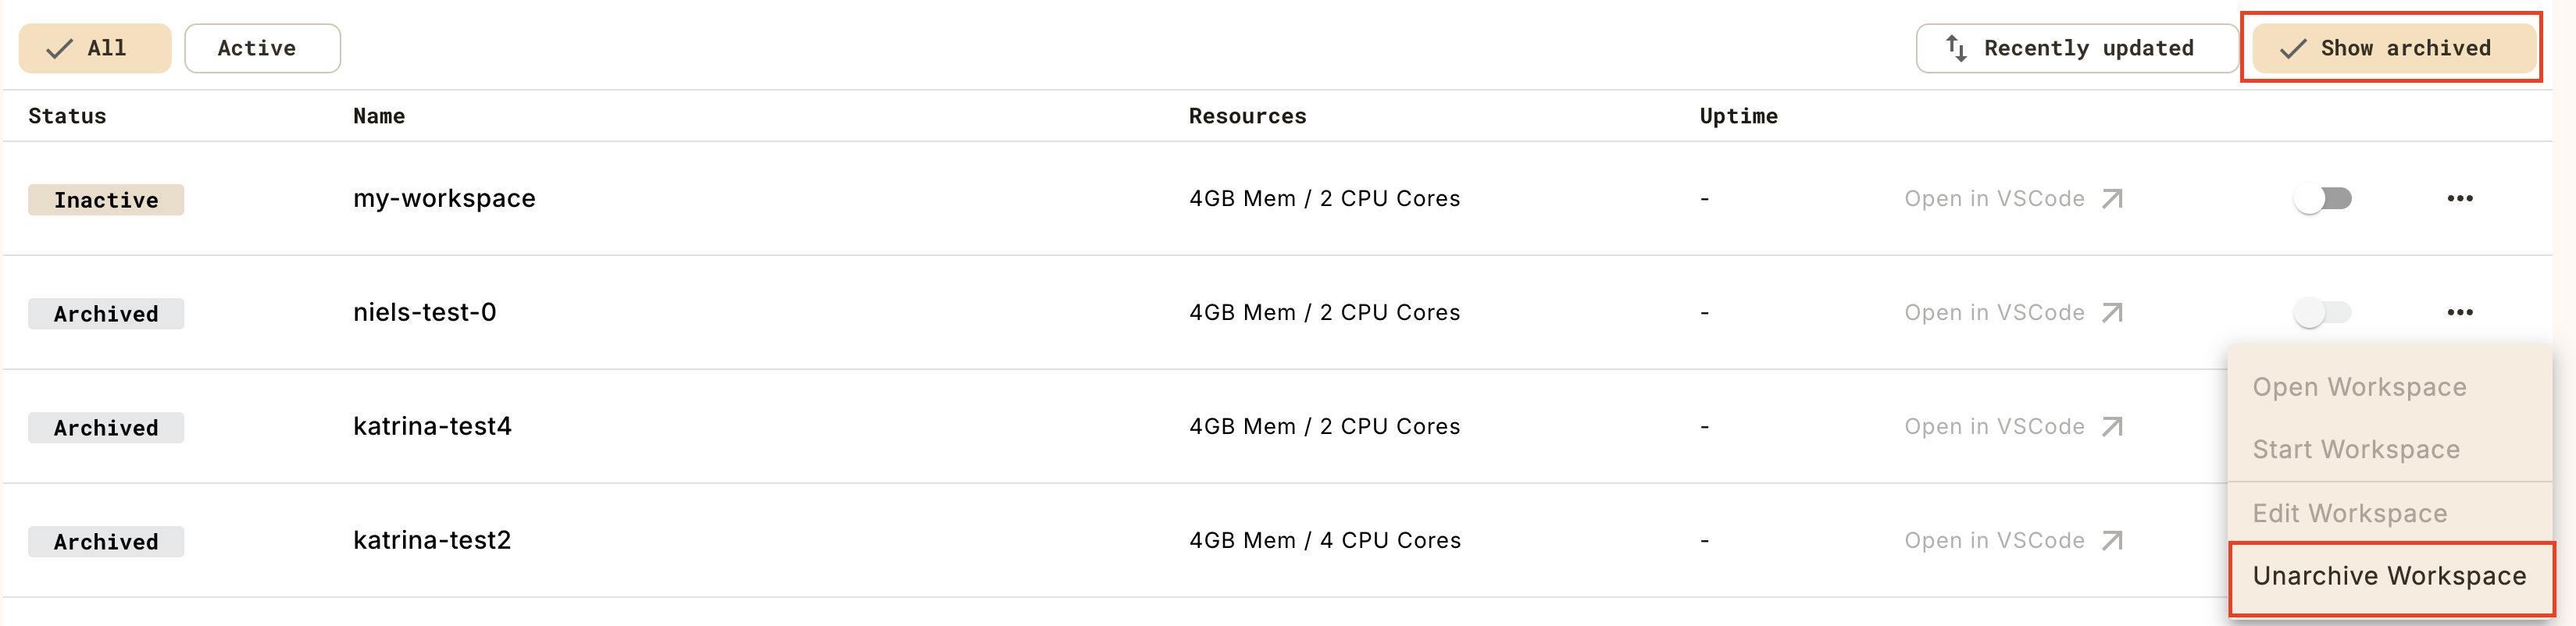
Show archived workspaces by clicking on the Show archived toggle on the top right of the workspaces list view. Unarchive a workspace by clicking on the Unarchive button:
Workspace CLI commands
The union CLI also provides commands for managing workspaces.
Create a workspace configuration
The first step is to create a yaml file that describes the workspace.
$ union create workspace-config --init base_image workspace.yamlThis will create a workspace.yaml file in the current directory, with the
default configuration values that you can edit for your needs:
name: my-workspace
description: my workspace description
project: <project>
domain: <domain>
container_image: public.ecr.aws/unionai/workspace-base:py3.11-latest
resources:
    cpu: "2"
    mem: "4Gi"
    gpu: null
accelerator: null
on_startup: null
ttl_seconds: 1200
Note that the yaml file contains a project and domain field that you can set to create a
workspace in a specific project and domain.
Create a workspace
Then, create a workspace using the union create workspace command:
$ union create workspace workspace.yamlThis command will also start your workspace, and will print out the workspace link that you click on to open the workspace in your browser:
Created: workspace_definition {
  ...
}

Starting workspace 'my-workspace'

🚀 Workspace started: Open VSCode in Browser
Stop a workspace
When you want to stop a workspace, use the union stop workspace command:
$ union stop workspace --name my-workspaceThis will print out a message indicating that the workspace has been stopped:
Workspace instance stopped: org: "org"
...
Update a workspace
To update a workspace, modify the workspace.yaml file and run the
union update workspace command:
$ union update workspace workspace.yamlThis will print out a message that looks something like:
Updated: workspace_definition {
  ...
}
Get existing workspaces
To get existing workspaces, use the union get workspace command:
$ union get workspaceThis will print out a table of all the workspaces you have access to in the specified project and domain (the command uses the default project and domain if you don’t provide them).
┏━━━━━━━━━━━━━━━━━━━━━━┳━━━━━┳━━━━━━━━┳━━━━━┳━━━━━━━━━━━━━━━━━━━━━┳━━━━━━━━━━━━━┳━━━━━━━━━━━━┓
┃ Workspace name       ┃ CPU ┃ Memory ┃ GPU ┃ Accelerator         ┃ TTL Seconds ┃ Active URL ┃
┡━━━━━━━━━━━━━━━━━━━━━━╇━━━━━╇━━━━━━━━╇━━━━━╇━━━━━━━━━━━━━━━━━━━━━╇━━━━━━━━━━━━━╇━━━━━━━━━━━━┩
│ my-workspace         │ 2   │ 4Gi    │ -   │ -                   │ 1200        │ -          │
└──────────────────────┴─────┴────────┴─────┴─────────────────────┴─────────────┴────────────┘
To get the details of a specific workspace, provide
the workspace name with the --name flag.
Start a workspace
To start a workspace, use the union start workspace command, specifying the
name of the workspace you want to start in the --name flag.
$ union start workspace --name my-workspaceYou should see a message that looks like:
Starting workspace 'my-workspace'

🚀 Workspace started: Open VSCode in Browser
Customizing a workspace
There are several settings that you can customize for a workspace in the UI or the CLI.
Setting secrets
If you don’t have any secrets yet, create them with the union create secret
command:
$ union create secret --project my_project --domain my_domain --name my_secretYou’ll be prompted to enter a secret value in the terminal:
Enter secret value: ...You can learn more about secrets management here.
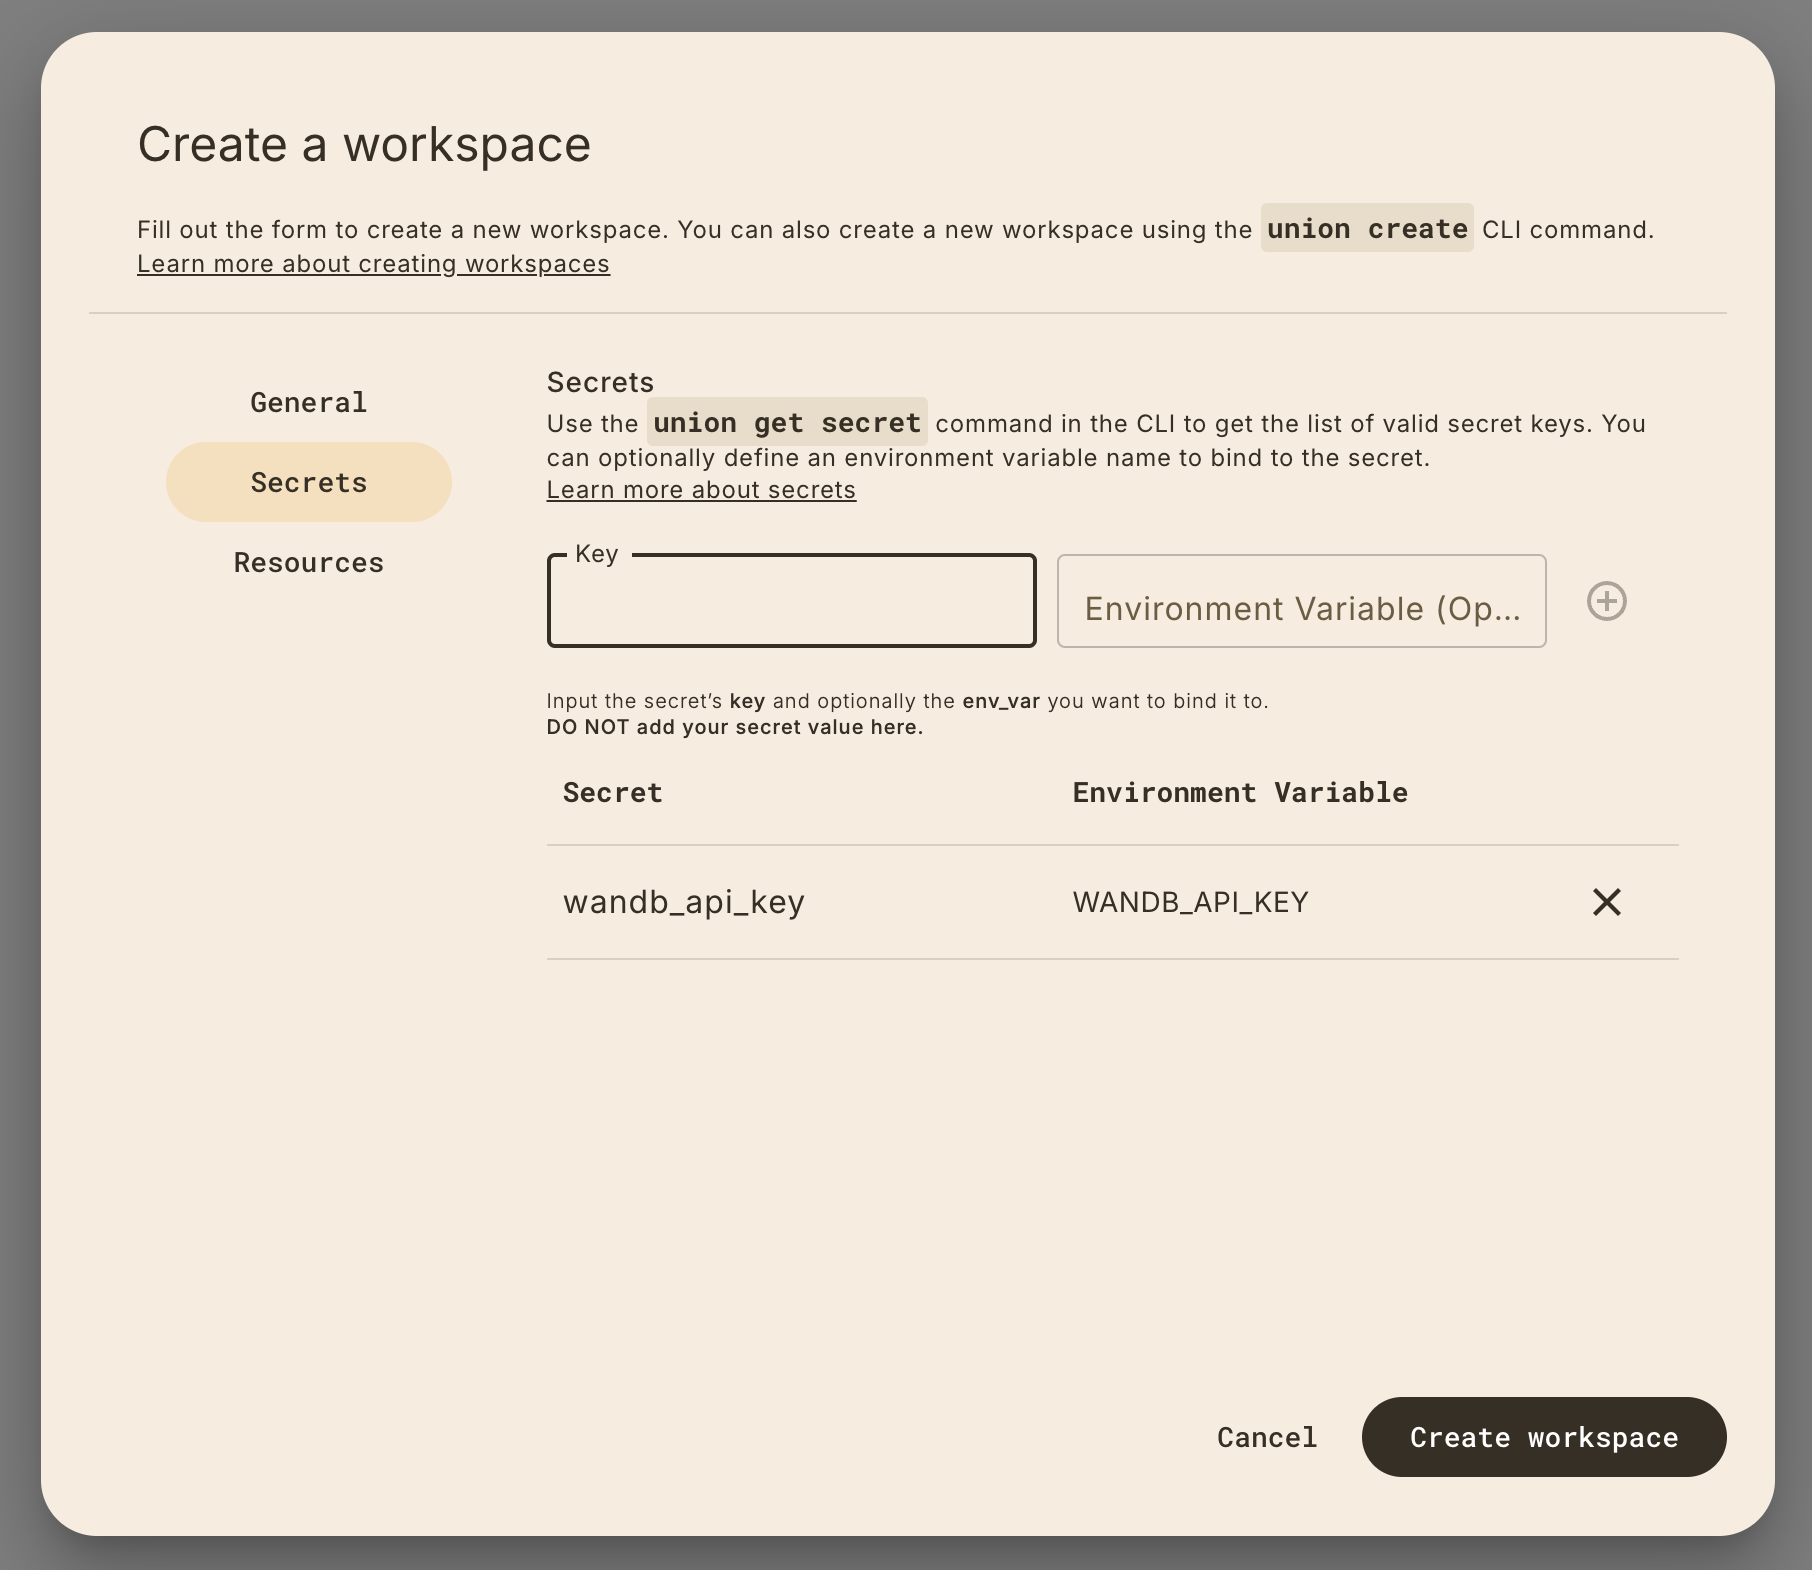
Set secrets for your workspace by clicking on the Secrets tab in the sidebar.
Provide the my_secret key and optionally, the environment variable you want
to assign it to in the workspace.
Setting secrets via the CLI
Set secrets via the CLI using the secrets key, which is a list of objects with
a key and env_var (optional) field:
name: my-workspace
description: my workspace description
project: flytesnacks
domain: development
container_image: public.ecr.aws/unionai/workspace-base:py3.11-latest
secrets:
    - key: my_secret  # this is the secret key you set when you create the secret
      env_var: MY_SECRET  # this is an optional environment variable that you
                          # can bind the secret value onto.
...
Setting CPU, memory, and GPU resources
You can also set the resources for your workspace:
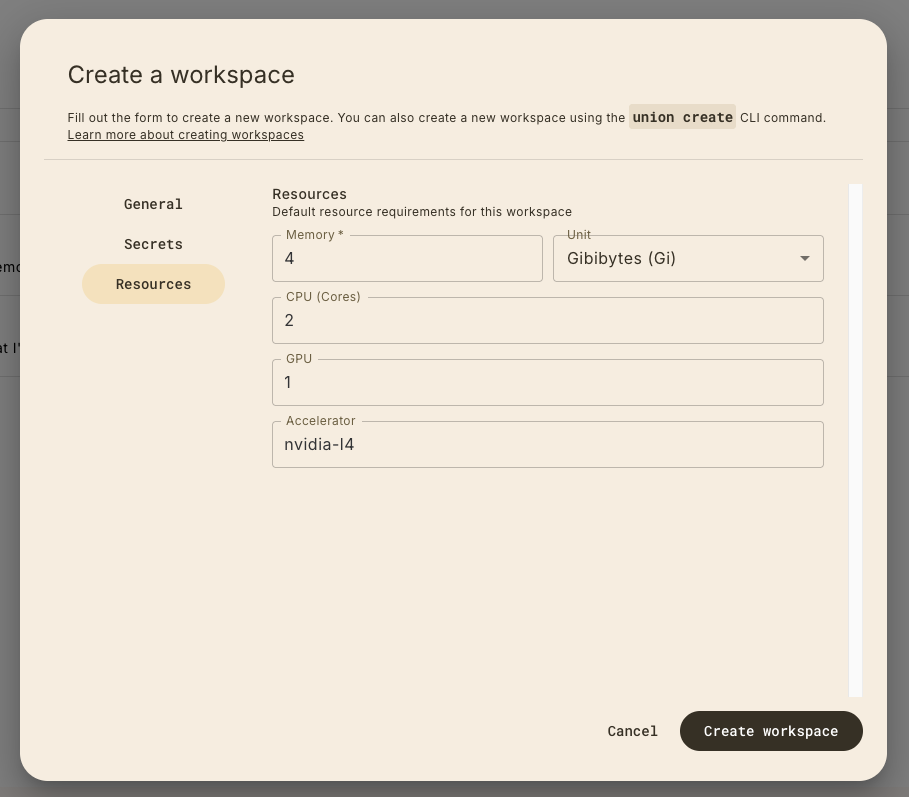
These resources must be compatible with the resources available to your BYOC cluster. Find the details of your BYOC cluster in the top-level dashboard:
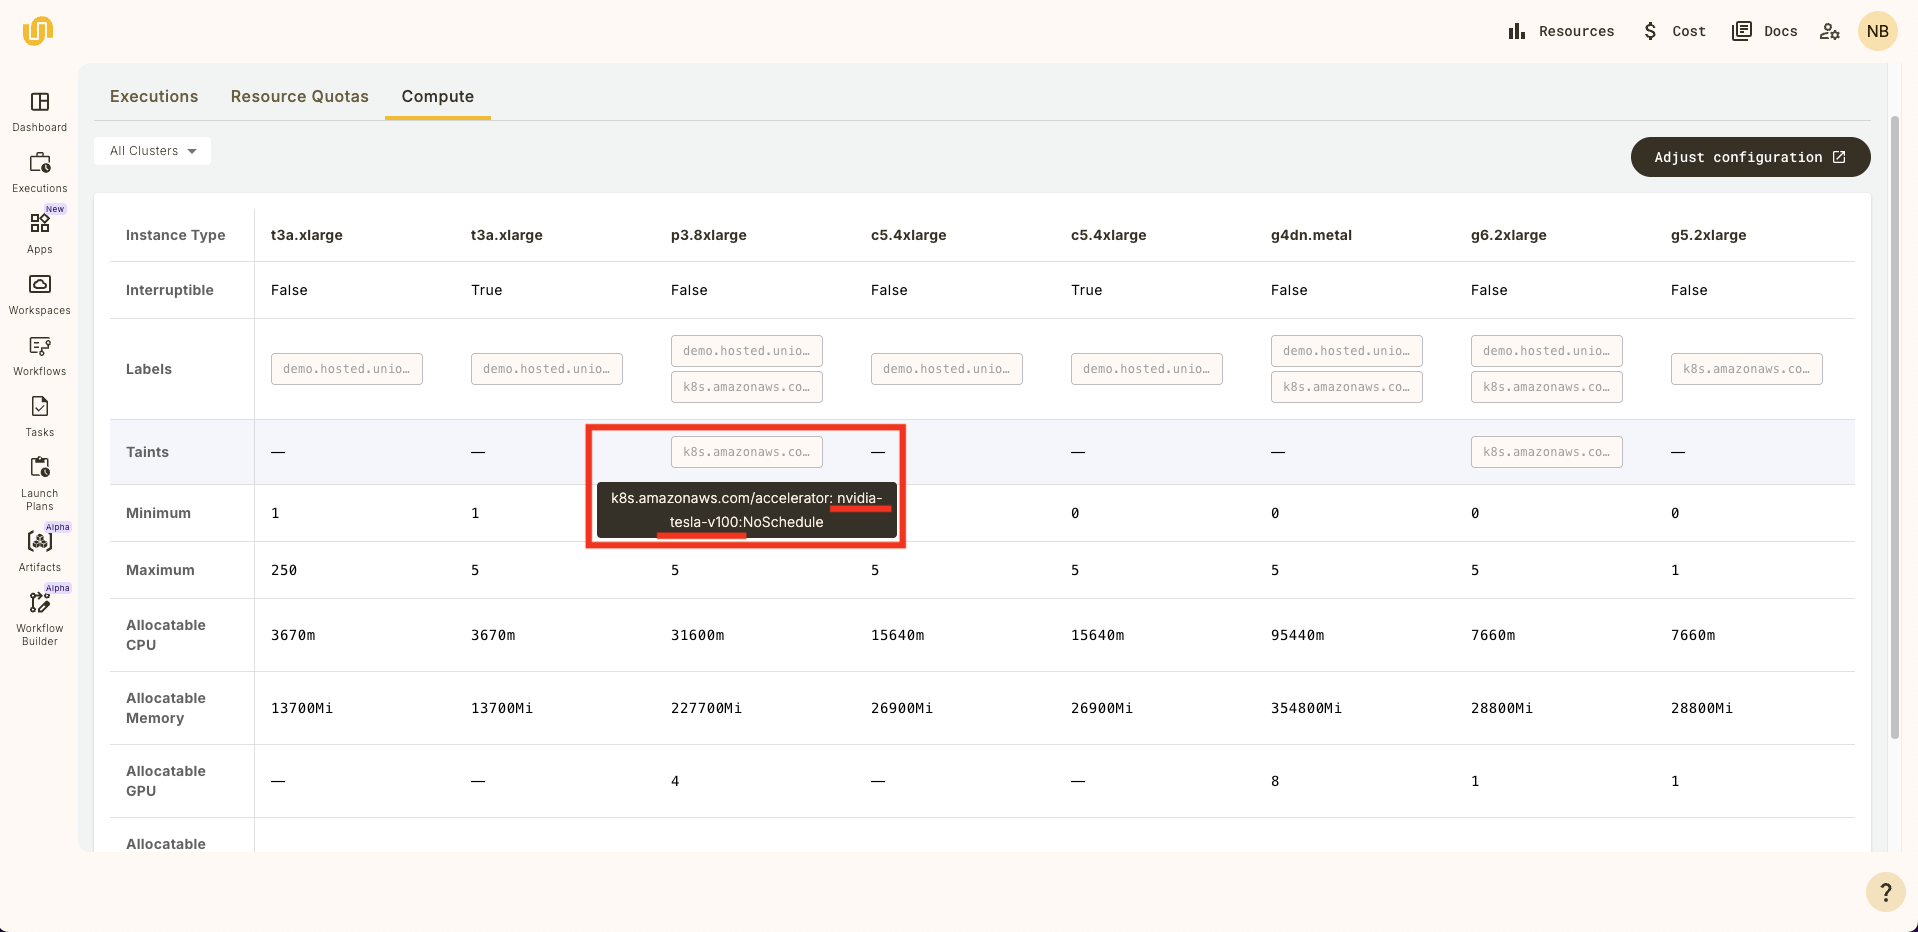
You can choose
the GPU accelerator that corresponds to your available instance types. In the screen shot above, the accelerator
value is nvidia-tesla-v100.
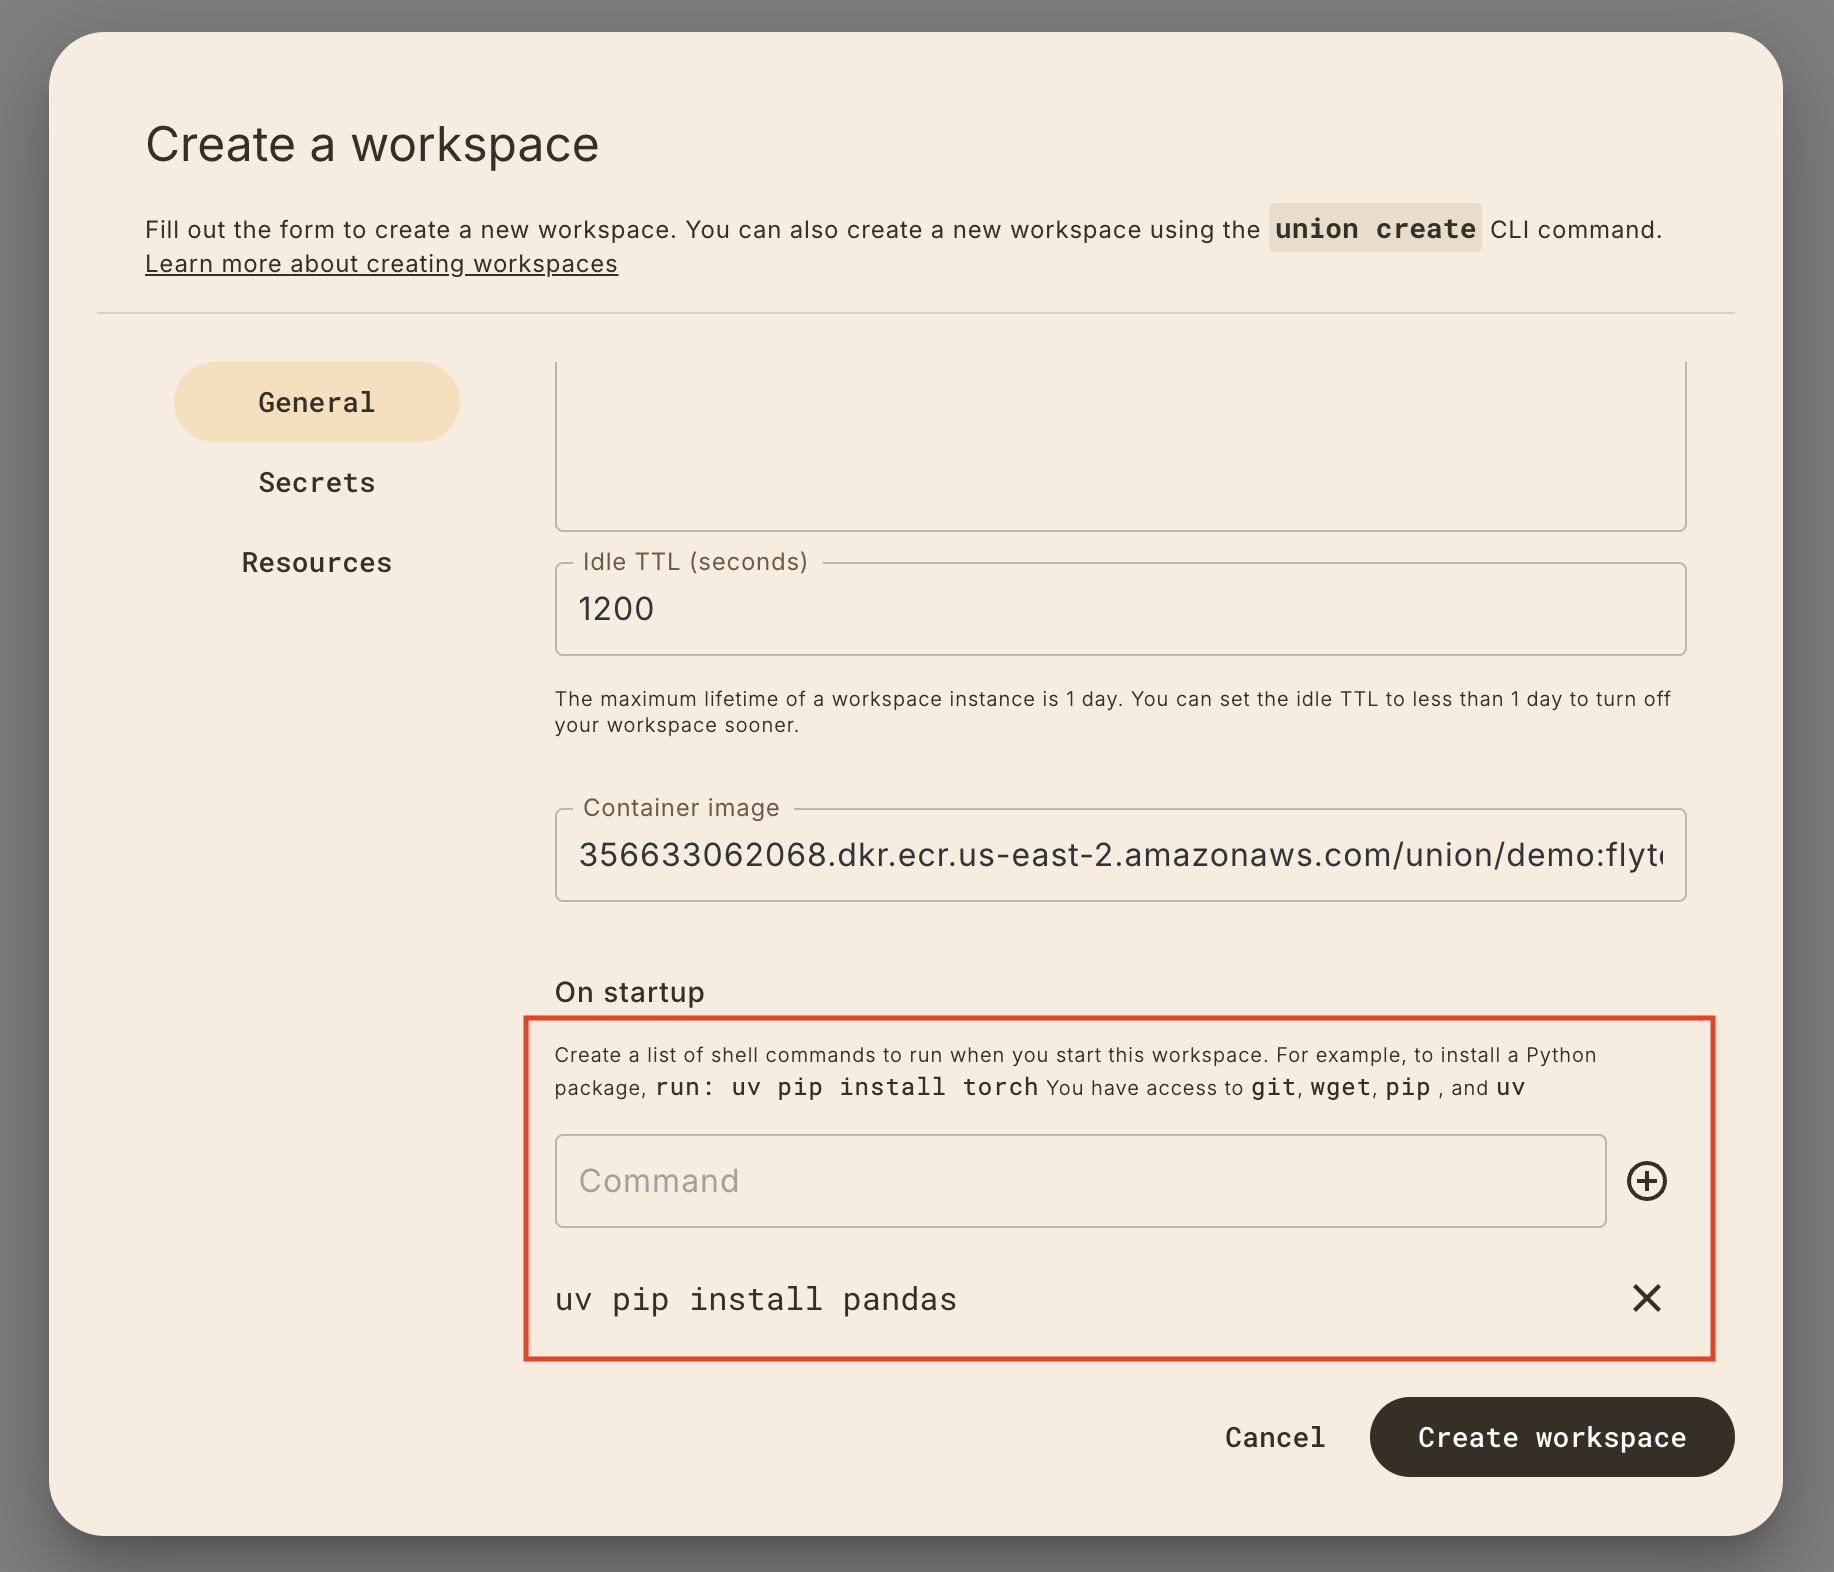
Specifying custom on_startup commands
If you need to run any commands like install additional dependencies or wget
a file from the web, specify custom on_startup commands:
Specifying custom container images
By default, the workspace will use a Union.ai-provided container image which contains the following Python libraries:
unionflytekituvipykernelpandaspyarrowscikit-learnmatplotlib
Specifying a custom container image in the UI
You can specify a pre-built custom container image by clicking on the Container tab in the sidebar and provide the image name in the workspace creation form.
The minimum requirement for custom images is that it has union>=0.1.166
installed in it.
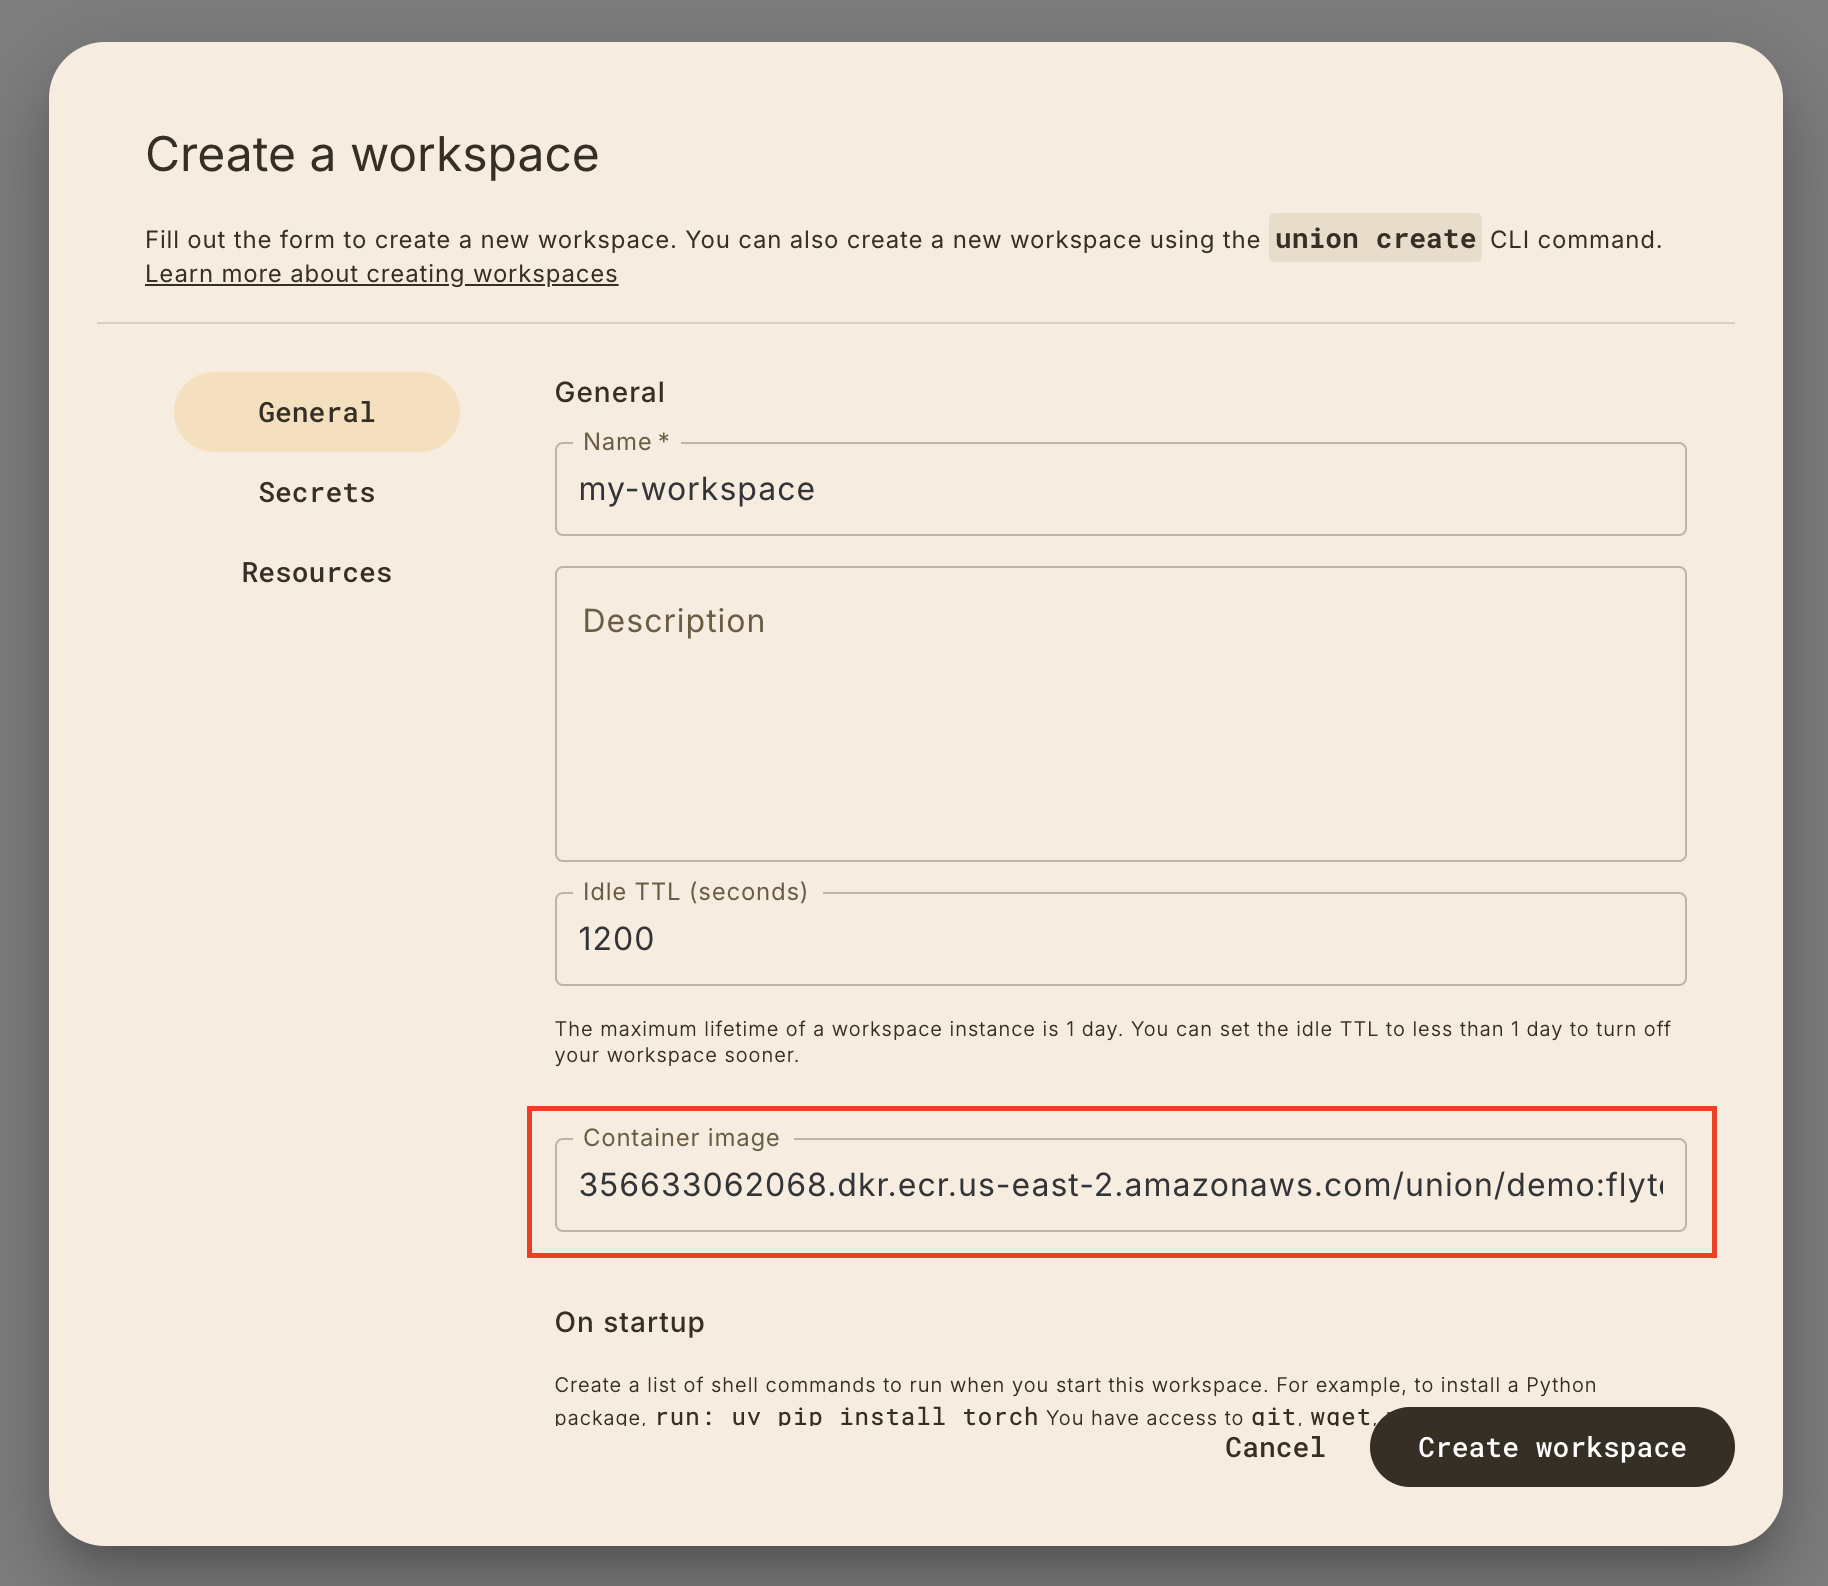
In many cases, you may want to use the same container image as a task execution that you want to debug. You can find the container image URI by going to the task execution details page:
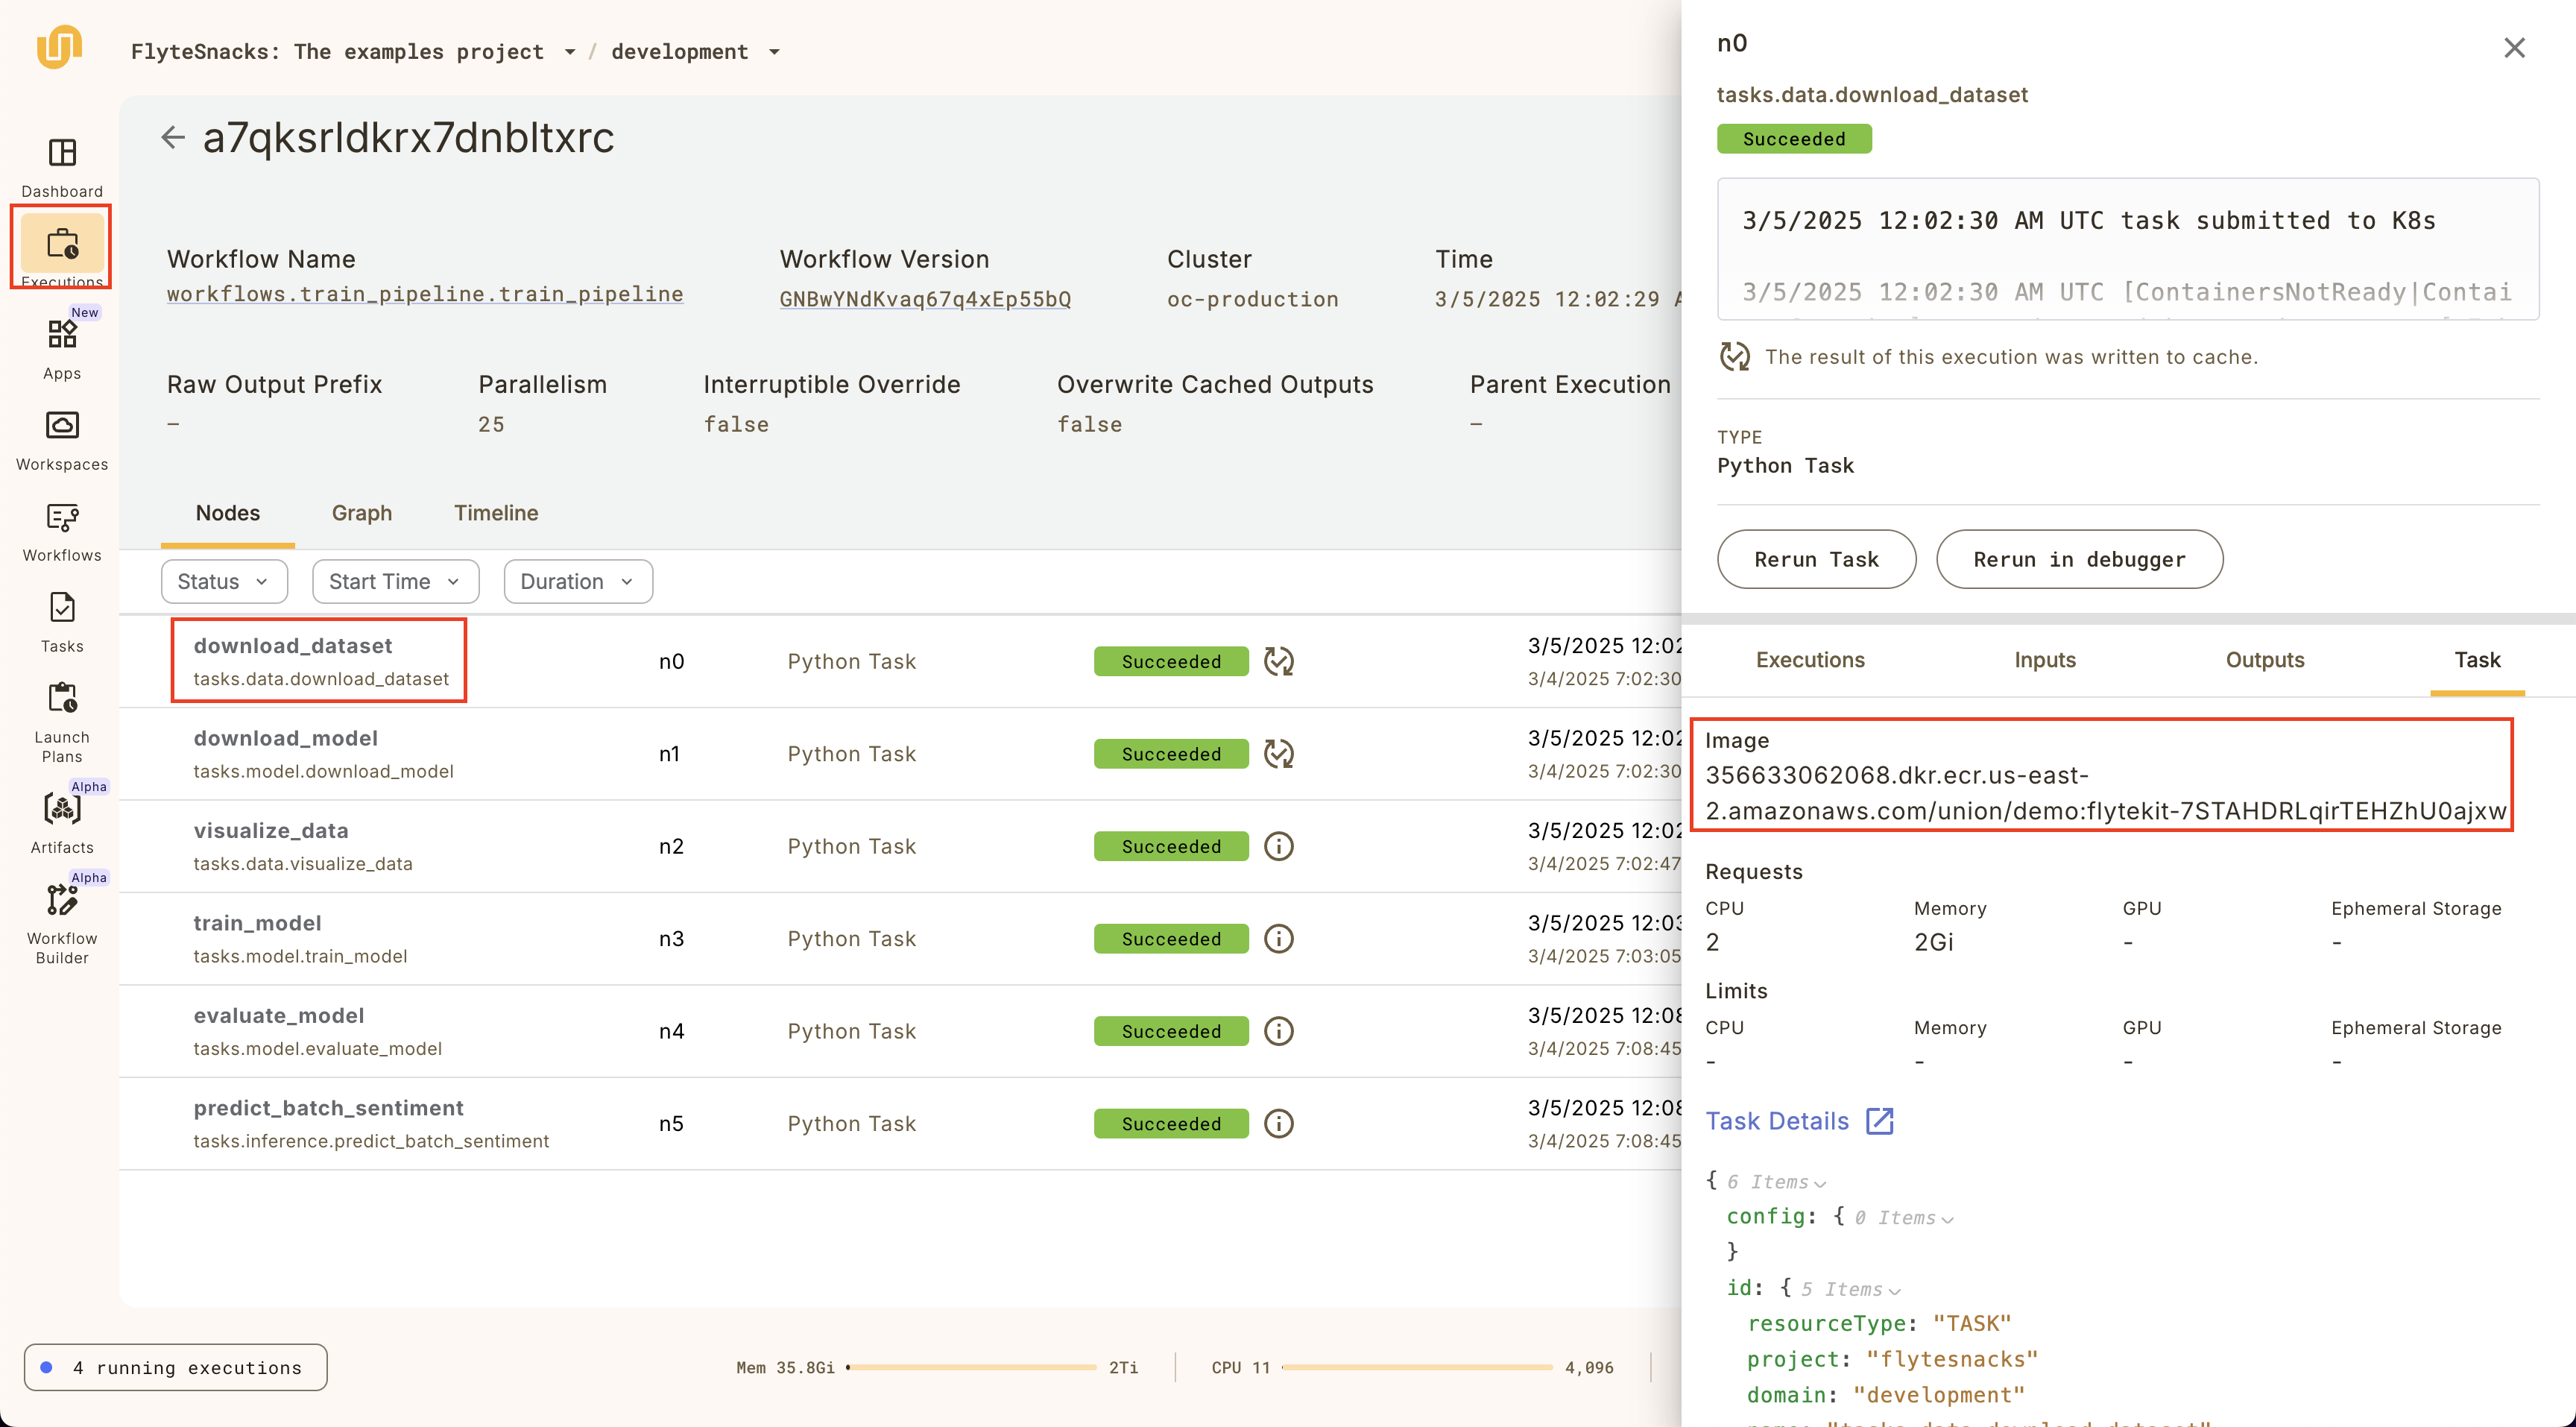
You can specify:
- Any public container image URI as long as it has
union>=0.1.166installed - Images built with the Union.ai image builder service
- Images available in your private container registry (e.g. AWS ECR, GCP Artifact Registry, or Azure Container Registry)
Specifying a custom container image in the CLI
The union CLI provides a way to specify a custom container image that’s built
by Union’s image builder service. To do this, run the following command:
union create workspace-config --init custom_image workspace.yamlThis will create a workspace.yaml file with a container_image image key
that supports the
ImageSpec arguments.
When you run the union create workspace command with this workspace.yaml file,
it will first build the image before creating the workspace definition.
Example: Specifying a workspace with GPUs
The following example shows a workspace.yaml file that specifies a workspace
with a GPU accelerator.
# workspace.yaml
name: workspace-with-gpu
description: Workspace that uses GPUs
# Make sure that the project and domain exists
project: <project>
domain: <domain>
container_image:
    name: custom-image
    builder: union
    packages:
    - torch
resources:
    cpu: "2"
    mem: "4Gi"
    gpu: "1"
accelerator: nvidia-l4
on_startup: null
ttl_seconds: 1200
Then run the following command to create the workspace:
union create workspace workspace.yamlThe configuration above will first build a custom container with torch installed.
Then, it will create a workspace definition with a single nvidia-l4 GPU accelerator.
Finally, it will start a workspace session. In the VSCode browser IDE, you can quickly
verify that torch has access to GPUs by running the following in a Python REPL:
import torch
print(torch.cuda.is_available())
See the Setting CPU, Memory, and GPU Resources section for more details on how to configure specific GPU accelerators.
Authenticating with GitHub
If you want to clone a private GitHub repository into your workspace, you can
using the pre-installed gh CLI to authenticate your workspace session:
gh auth loginYou’ll be prompted to enter either a GitHub personal access token (PAT) or authenticate via the browser.
You can create and set a GITHUB_TOKEN secret to set the access token for your
workspace, but you’ll need to authenticate via gh auth login in every new
workspace session:
- Create a secret with the
union create secretcommand - Create a workspace or update an existing one with the
GITHUB_TOKENsecret, setting the environment variable to e.g.GITHUB_TOKEN - In the workspace session, run
gh auth loginto authenticate with GitHub and use the$GITHUB_TOKENenvironment variable as the personal access token.
Sorting and filtering workspaces
You can filter workspaces to only the active ones by clicking on the Active toggle on the top left of the workspaces list view.

Sort by recently updated by clicking on the Recently updated toggle on the top right of the workspaces list view, and you can also sort by recently updated by clicking on the Recently updated toggle on the top right of the workspaces list view.

Troubleshooting
You may come across issues starting up a workspace due to various reasons, including:
- Resource requests not being available on your Union cluster.
- Secrets key typpos of not being defined on the project/domain.
- Container image typos or container images not existing.
Under the hood, workspaces are powered by Union.ai tasks, so to debug these kinds of issues, the workspace detail page provides a link to the underlying task that’s hosting the VSCode IDE:
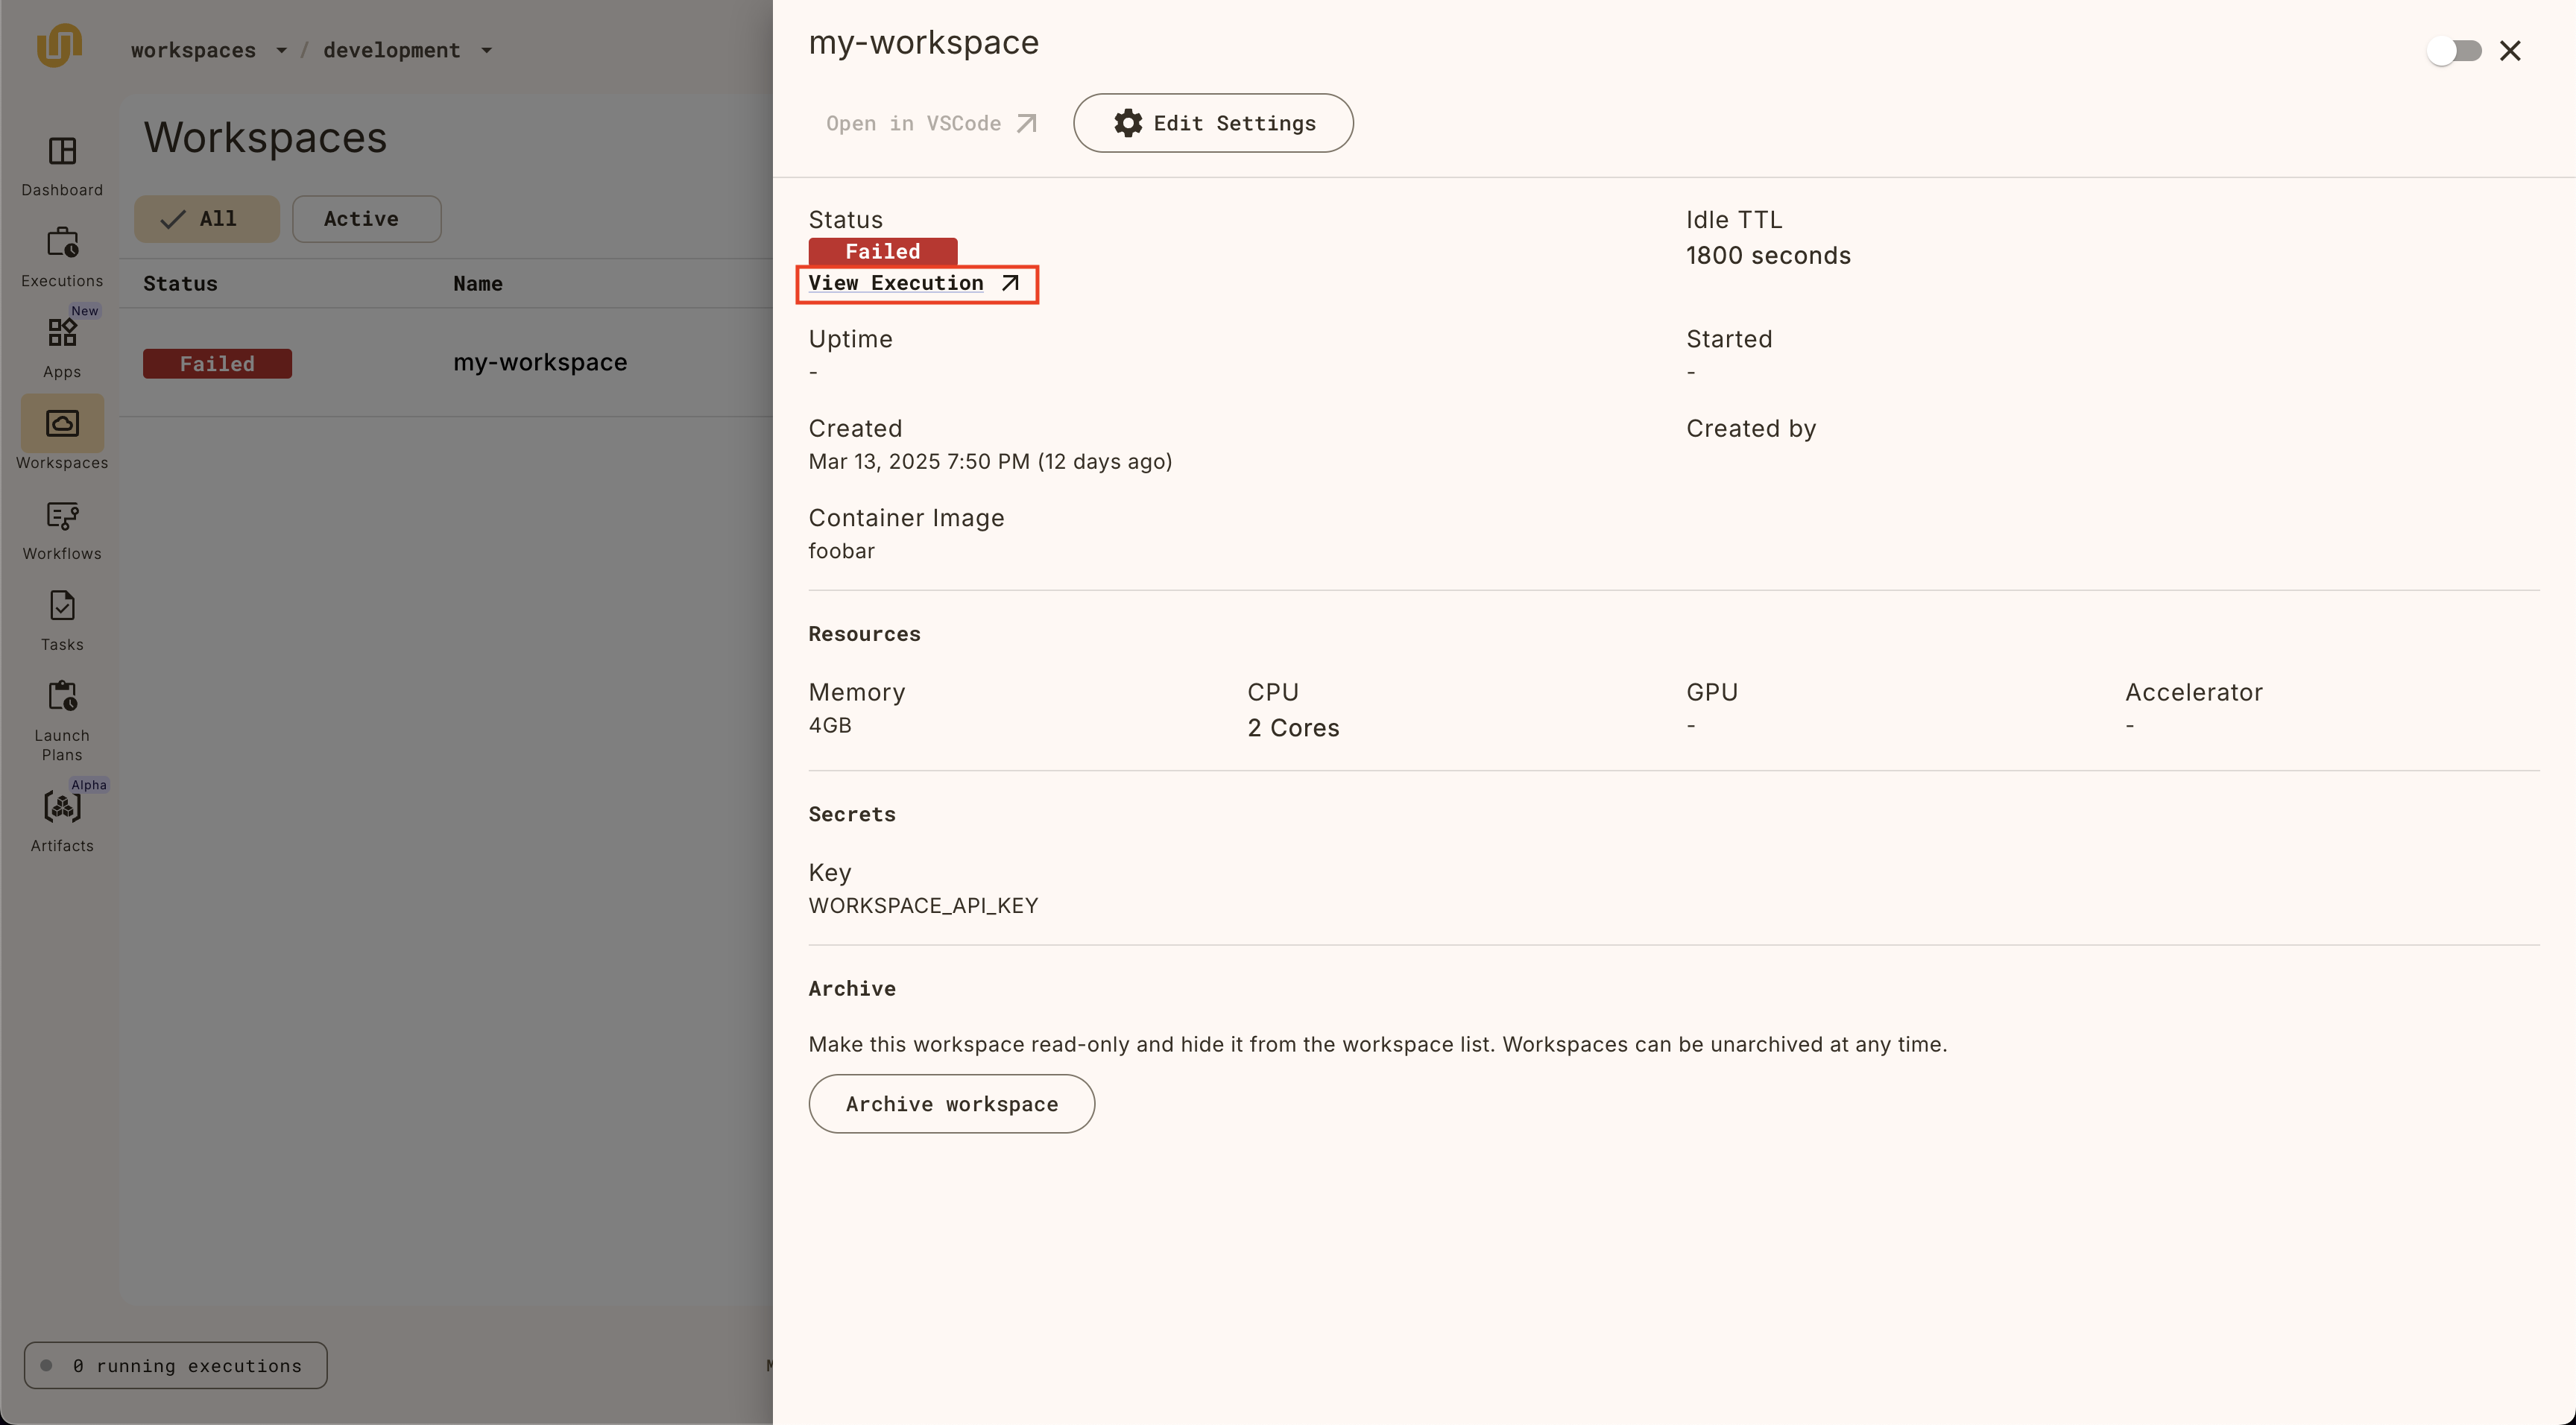
Clicking on the link will open the task details page, where you can see the underlying task definition, pod events, and logs to debug further.
